Archive for the ‘Recipes’ Category

Quick French Dip

Monday, January 18th, 2010 by virginia

After our Secret Santa dinner we had tons of leftovers, including an entire 2lb cooked and uncut london broil. Josh and I don’t exactly understand restraint when we host dinners so we always go a tiny bit overboard in terms of the amount of food we get. The leftovers were good because I didn’t have to worry about what to bring for lunch the next two weeks, but I didn’t want to reheat the london broil since it’s a pretty tough cut of meat to begin with. I thought of slicing it up cold and laying it on top of a salad but that seemed a bit boring. Then I was struck with the idea of making a steak sandwich, specifically a french dip, so that the heat of the dipping broth would warm up the meat a bit without overcooking it.

Josh picked up some bread from Amy’s Bread on his way home, a rustic loaf with a sturdy crust and caraway seeds. The texture of the loaf and crust were really nice but I wasn’t a fan of the caraway seeds. The bread held up well though against all the sandwich fillings and the dipping sauce.

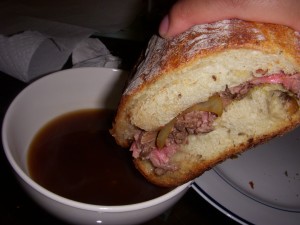
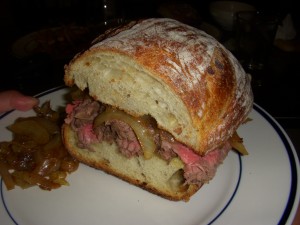
Sliced london broil, caramelized onions, and melted swiss cheese on rustic bread

To prepare the sandwich, I first sliced up a medium onion and caramelized it in a pan. Then I split the bread open lengthwise and placed a few slices of swiss cheese on each side. I melted the cheese under the broiler so that it was soft and just starting to brown, and the crust of the bread got a bit toasty. I placed thin slices of the london broil on one side and piled on the caramelized onions on the other side.

Constructed sandwich with extra caramelized onions on the side

For the dipping sauce, I went the quick and easy route with Lipton’s french onion soup mix. Just follow the directions on the package. I boiled it down a bit so that the flavor would be more concentrated. The sandwich was really thick and hearty, and dipping it into the soup softened it up a bit and helped provide some extra flavor.

Lots of french dipping action

I was actually really happy with how the quick french dip turned out. The key was to slice the london broil really thinly, so that it stayed tender. It was a great way to use up a lot of the leftover steak, and the sandwich was a nice mix of flavors and textures. It’s definitely something that I would make again, and maybe not even just with leftovers. It was quick and easy to make, and it turned out to be a tasty and filling dinner.

Amy’s Bread (multiple locations)
672 9
th Ave. between 46th and 47th St.
New York, NY

Secret Santa Dinner

Sunday, January 10th, 2010 by virginia

Josh and I hosted our first dinner in our (not so new anymore) apartment, a gathering with some friends to do a Secret Santa exchange. Our menu was somewhat of a traditional holiday meal, which featured a roasted turkey, mashed potatoes, gravy, and cranberry sauce. We also made marinated and broiled London broil, sautéed green beans with garlic chips, roasted asparagus, Caesar salad, and potato zucchini kugel.
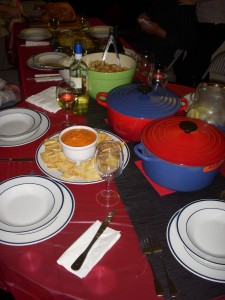
Our full holiday dinner table (not a great shot unfortunately because we were too busy setting everything up)

We’ve never roasted a turkey by ourselves before and knew that we wanted to brine it first, since we’ve read that it really helps keep the meat moist and flavorful. Finding a non-kosher, non-butterball turkey was actually kind of hard, and we went to several supermarkets before we finally found one that suited our needs. I forget what brand it was but it was frozen and cheap, weighing in at almost 13 lbs. Following a recipe from Cooks Illustrated, we let it defrost for a day, then soaked it in a simple brine made from two gallons of water and two cups of salt. Seriously, that’s it. It was really easy – the hardest part was finding a tub big enough to hold the turkey and brine but small enough to fit in our refrigerator.
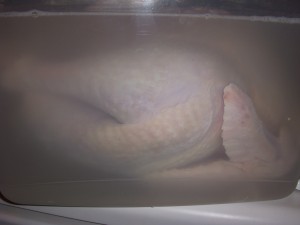
Turkey brining in salted water

After brining the turkey for four hours (that’s all it needed!), we set it on a v-rack uncovered in the fridge to dry out the skin. This helps the skin get more crispy during roasting, but you don’t have to do it if you don’t mind soggier skin.
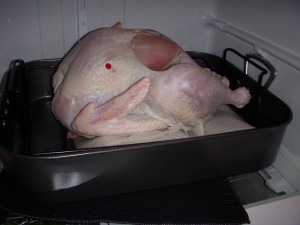
Turkey hanging out in the fridge to dry over night (for some reason our turkey was missing a chunk of skin on the breast!)

To prepare the turkey, we simply put carrots, celery, onions, thyme, and melted butter into the body cavity, then tied the legs together. We put the same mix of vegetables into the bottom of the roasting pan with some water. Then we brushed melted butter over the entire turkey.
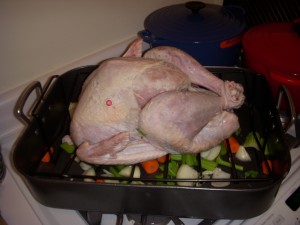
Trussed turkey ready to go into the oven

We cooked the turkey according to the directions from the Cook’s Illustrated recipe for classic roast turkey. This involved rotating the turkey every so often so that it cooks more evenly. The total cook time is approximately two hours, so it’s really not that difficult or time consuming to make a roasted turkey!

The result? A golden turkey that was super moist and flavorful. The skin didn’t get as crispy as we would have liked but the rest of the bird was perfect. It was really juicy and the meat was seasoned the whole way through. Seriously, everyone should brine their turkeys from now on! Our cheap bird ended up tasting divine, and we were both thrilled with the results.
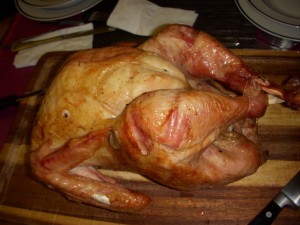
Golden turkey right out of the oven

Although there weren’t enough pan drippings to make a gravy, fortunately we had saved all the giblets and innards, which Josh sauteed with some onion to develop the flavor. He made a gravy using those giblets, the vegetables from the turkey roasting pan, some chicken stock, and white wine. The gravy was thickened with a simple roux of butter and flour, and it was one of the best gravies I’ve ever tasted.

For the London broil, we bought two steaks that were a little less than 2 lbs each. We marinated each steak separately in large Ziploc bags overnight. First we liberally sprinkled salt, pepper, and garlic powder on each side of the steaks and rubbed it in a bit before placing them inside the bags. Then we just poured the marinade ingredients into the bags directly. The marinade for each steak included a 12 oz bottle of beer (any kind, we used a cheap one so that we wouldn’t waste a good beer), a healthy drizzle of soy sauce, a few dashes of Worcestershire sauce, a squirt of sriracha (we like a little spice but you can omit this if you don’t want any heat), and two crushed cloves of garlic. Close the bags and leave a bit of air so you can squish everything together until the marinade is combined and coating the pieces of steak. Then open the bag a tiny bit, squeezing excess air out until the marinade sticks to the steak more closely. At that point, reseal the bag the whole way and place the bags in a container to catch any leakage and place it in the fridge to marinate overnight.
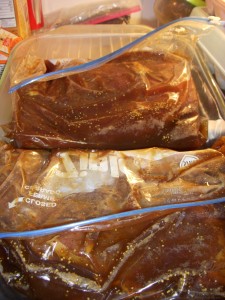
London broil marinating in ziploc bags

To cook the steaks, place them on a big flat sheet pan that’s covered in foil for easy cleanup, pour some marinade over the top, and place it directly in the oven under the broiler. The steaks cook for about 10 minutes on one side and slightly less on the other side (we like our steak to be rare). When you flip, pour some more marinade on the other side. They’ll form a nice brown outer crust and are still pink in the middle. Slice it thinly on the bias, against the grain. This is a cheap cut of meat so it can be a bit tough, marinating the steaks overnight and slicing it thinly really helps make it much more tender.

My proudest contribution was the potato zucchini kugel. I followed this recipe, and it really was so simple to make and very delicious. I grated the potatoes, zucchini and onion by hand, which was the part of the recipe that required the most work, but I thought it was easier than using a food processor and trying to do everything in batches.
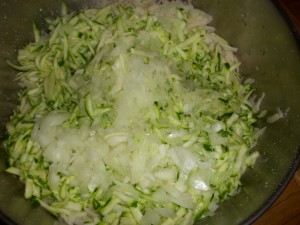
Grated potatoes, zucchini, and onion

I had made kugel only once before, a potato kugel for Rosh Hashanah dinner at Josh’s house, but I thought the zucchini really added a lot more to the dish. The zucchini made the kugel taste lighter and fresher, and this is the version that I’ll be making from now on.
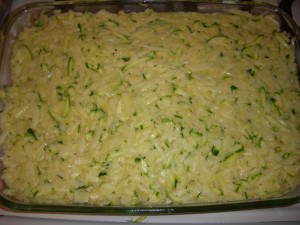
Potato zucchini mixture ready to go into the oven

The other sides were pretty much no-brainers. Mashed potatoes = easy; boil peeled potato chunks + butter + cream + salt + pepper.

Cranberry sauce = 1 can of Ocean Spray cranberry sauce + 1 can Dole pineapple chunks, crushed; combine and mix together.

Sauteed green beans = sautee a few cloves of chopped garlic in olive oil + throw in washed green beans with ends trimmed; sautee until tender but still crunchy.

Roasted asparagus = washed asparagus with tough ends snapped off + drizzle of olive oil + chopped garlic + salt + pepper + grated parmesan cheese; rub the oil and seasonings over the asparagus and spread out the spears on a large flat baking sheet, roast at 400 degrees for 10 minutes until tender but still crunchy. Remove from oven and grate parmesan cheese over the top.

We also made a Caesar salad with homemade dressing, but I’ll do a post on that at a later time. Caesar salad topped with homemade croutons and some sort of protein is one of our favorite quick suppers.
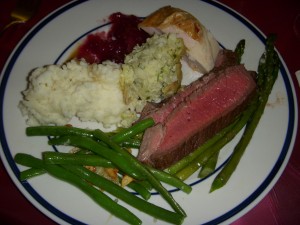
London broil, asparagus, green beans, mashed potatoes, cranberry sauce, potato zucchini kugel, turkey

In the morning, Josh and I had created of schedule of when we needed to start prepping certain dishes and when they needed to be cooked. It got a bit hectic towards the end but we managed to finish on schedule. Our tiny kitchen was a disaster, but we really had a fun time with the dinner and the Secret Santa exchange. Both of our Santas knew us all too well. I got a gift certificate to Becco, my favorite restaurant, and Josh received a bottle of wine and a Vinturi wine aerator. All of those will be put to good use, for sure. Thanks, Santas! And we hope that everyone had a wonderful holiday season!

Tahoe Day 2 – Happy New Year!
Wednesday, January 6th, 2010 by virginia

After a long, exhausting day on the slopes (10,000+ feet altitude really does get to you!), Claire and M still managed to put together a huge and lovely spread for the New Year’s Eve gathering we had at our house. There were about 20 of us altogether and there was so much delicious food that I couldn’t stop filling my fat belly. Claire really outdid herself in preparing some really interesting appetizers and I hope she’ll share the recipes!

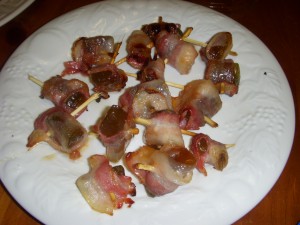
As promised, she made pickled watermelon rinds wrapped in bacon.

Pickled watermelon rind wrapped in bacon

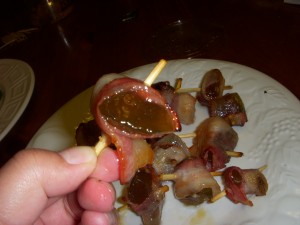
The pickled rind was sweet and sticky, tasting a bit like honey bbq sauce, and the bacon added a nice saltiness and smokiness that complemented the rind very well.

Close up shot of the pickled rind/bacon

Claire also made dates stuffed with manchego cheese wrapped in bacon. These were also sweet and salty and oozing nutty cheese from the center. I couldn’t wait to have one and ended up burning my tongue on the molten cheese!

Dates stuffed with manchego cheese and wrapped in bacon

Another interesting appetizer was roasted sweet potato pureed with orange rind and orange juice. The puree was placed on crackers and topped with smoked almonds.

Sweet potato puree with orange juice and orange rind on crackers, topped with smoked almonds

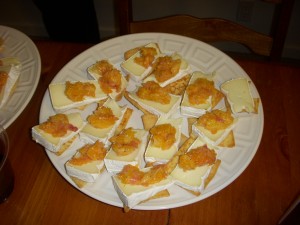
Surprisingly, however, one of my favorite appetizers was slices of brie on pita chips topped with clementine chutney. I don’t really like brie, and would typically not eat such a huge chunk of it at once, but combined with the chutney, it turned into something entirely different. It was creamy and sweet and just lovely to eat.

Brie on pita chips topped with clementine chutney

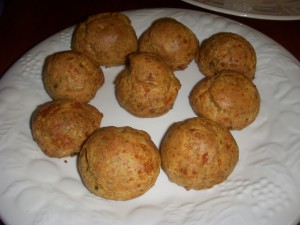
M made her specialty cheese gougeres, which were light, airy, and addictive.

Cheese gougeres

She also made a simple but awesome tomato bruschetta.

Tomato bruschetta

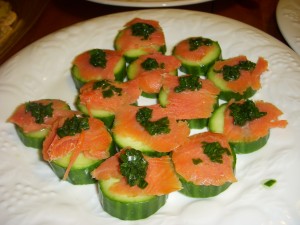
Other appetizers included cucumber slices topped with smoked salmon and a lemon/scallion mixture…

Cucumber topped with smoked salmon

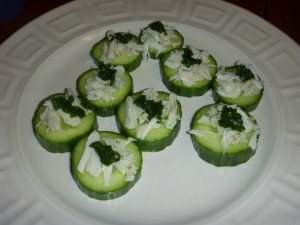
And the same with pieces of crab.

Cucumber topped with crab

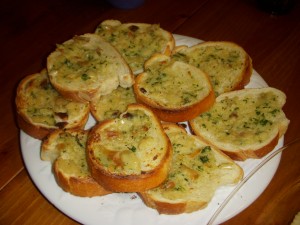
We also had garlic bread, which paired perfectly with our main course of spaghetti and meatballs.

Garlic bread

Sean was the one who made all the meatballs and the red sauce a few days before our trip. The sauce, which takes several hours to simmer, was really fantastic, and the meatballs were tender and flavorful.

Spaghetti with meat sauce and a meatball

The feast didn’t stop there – Claire went all out on the dessert. First was red velvet cupcakes with cream cheese frosting, which she placed on a cupcake stand and stuck candles in them in honor of her friend’s 30th birthday. The cupcakes were really yummy and moist.

Red velvet cupcakes

Next were huge platters of mince pies, which Claire had been preparing for over a year – that’s how long it takes for the fruit in the mincemeat to soak in alcohol!

Mince pies

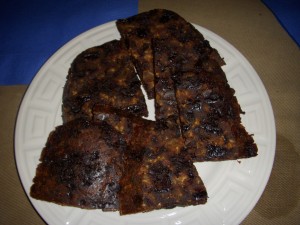
And last, but definitely not least, we had slices of Claire’s Christmas pudding. It was also chock full of fruit and very dark and rich.

Christmas pudding

We all had a great time eating and drinking the whole night. Josh and I celebrated New Years twice, first by watching the Times Square ball drop on TV and calling our family on the east coast, and then celebrating with everyone at midnight Pacific time. It was hard to stay up but so worth it. Thanks very much to Claire for organizing everything, it was definitely a New Years celebration to remember!

Pimientos de Padron

Friday, December 11th, 2009 by virginia

When Josh and I were in Spain in 2006 with my mom, I jokingly stated before we went that I wanted to eat tapas every single day we were there. And surprisingly enough, we did. Whether it was a full meal or just for an afternoon bar snack, we actually did have at least a couple of tapas each day. The dishes we chose varied, ranging from patatas bravas to spanish tortillas to assorted seafood, but there was one tapa that we ordered every time we saw it on the menu – pimientos de padron.

Snacking on pimientos de padron with cava sangria at a bar in Barcelona. Funny story about the cava sangria, but that's best saved for another time

Snacking on pimientos de padron with cava sangria at a bar in Barcelona. Funny story about the cava sangria, but that's best saved for another time...

Pimientos de padron are small green peppers about the same size as a jalapeno, but they are softer and more wrinkly in texture. Padron peppers are really hard to find around here so many times people substitute shishito peppers instead. The cool thing about eating pimientos de padron, however, is that it’s like playing Russian roulette with your mouth. As the saying goes, some are hot and some are not. Although different sources vary on the percentage of spicy peppers, we heard that one out of every 10 are hot.

So we were in Spain for about 8 days, and day after day we ate pimientos de padron, hoping for a spicy one. My mom, who loves spicy foods, was especially eager to taste just how spicy these peppers could be. Day after day, none of us struck gold with a spicy pepper. Then on our last day in Spain, Josh and I had gone off on our own to watch a Barcelona soccer game at Camp Nou. Before the game, we stopped in a crowded restaurant to grab a quick bite to eat. And of course we ordered pimientos de padron.

At this point I had stopped believing that padron peppers could be spicy. All of a sudden, on my very last pepper, my mouth exploded in fiery pain. The spiciness actually wasn’t terrible, it was just the surprise of it that startled me. Josh had a little nibble and confirmed that this was indeed a spicy one. So out of the almost 100 padron peppers we ate collectively, only one was spicy. And sadly, my mom wasn’t there to experience it.

Josh and I have often lamented our lack of access to padron peppers here in NYC so when our friends Felipe and Silva went to Spain to visit Felipe’s family, they brought us back a packet of padron pepper seeds. Not being the best gardener, I gave the seeds to my mom, who has the greenest thumb. From one little packet of seeds, she managed to sprout several pepper plants, and she called us home to NJ when the first crop of peppers was ready to harvest.

Picking out a few padron peppers to cook up

Picking out a few padron peppers to cook up

Although there were several peppers sprouting, only five were ripe for plucking. We cut those off and prepared them how they’re done in Spain, fried in oil and sprinkled with coarse salt.

Frying up the peppers in some oil

Frying up the peppers in some oil

The three of us each took a pepper, clinked them together in a toast, and all took a bite at the same time.

Fried pimientos de padron sprinkled with coarse salt

Fried pimientos de padron sprinkled with coarse salt

Both my mom and I yelped in shock, our mouths on fire, while Josh just calmly chewed on his. The ones we had were SPICY, much spicier than the spicy one I had in Spain. My mouth was numb and tingling afterward. But the flavor of the pepper was exactly as I remembered, a little sweet, a little bitter, and a bit smoky. I nibbled on Josh’s and confirmed that his was most definitely not spicy.

We saved the last two peppers for Josh’s parents, but I don’t know if they ended up eating them and whether or not they were spicy. Even if they weren’t, 2 out of 5 spicy peppers was a huge difference from the 1 out of 100 we had in Spain. It was just such a fun time for us to be able to play the pepper roulette game again, and brought back great memories of our trip. So thanks very much to Felipe and Silva for bringing home a little bit of Spain for us, and we can’t wait until the next batch is ready to harvest!

Fun with Leftovers – Alu Chaat and Curry Chicken Mash-up

Sunday, December 6th, 2009 by virginia

As I’ve said before, I absolutely hate wasting food and even if I don’t like a dish, I refuse to throw it away. Instead, I’ll try to figure out a way to make it better. If the end result is still not good, then I don’t feel so bad tossing it because at least I tried my best to salvage it.

So after we had pretty terrible alu chaat at Indus Express, with bland, almost raw potatoes, I took home the leftovers and tried to think of a way to “fix” it. Inspiration struck after our delivery meal from Pearls, where we got some mediocre curry chicken with almost raw onion slices. Why not combine the two and cook it together, so that the almost raw ingredients are cooked through and each adds an extra layer of flavor to the other?

And so that’s exactly what I did. I cut the curry chicken down into smaller chunks and heated it in a pan, letting the onions cook through more fully. I didn’t want to lose the freshness of the ingredients in the alu chaat, like the cucumber and mango pieces, so I waited until the chicken was heated through first before tossing in the chaat. I mixed everything together, so that the spices from both dishes mingled, and cooked it just enough for the potatoes to soften a bit.

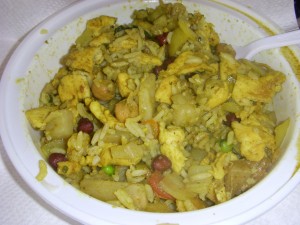
To finish, I spooned everything over leftover white rice from Pearls that I had reheated, and mixed it all together. The result was an interesting and complex-tasting dish that leaned more toward the Indian side than the Chinese side, but the curry chicken and the alu chaat complemented each other perfectly, and any issues they had as individual dishes were resolved in the mash-up. The potatoes and onions were no longer almost raw, and the spices from each dish eliminated the previous blandness and lack of seasoning.

Alu chaat and curry chicken mash-up

Alu chaat and curry chicken mash-up

Overall I was thrilled with the results, and pleased that I didn’t have to waste any food. The dish I wound up with was interesting, tasty, and flavorful – exactly what I was looking for!

Homemade Cuban Sandwiches on Amy’s Bread

Sunday, November 29th, 2009 by virginia

Josh was on an Amy’s Bread kick one week and would stop there every day on his way home to pick up a nice baguette or some tasty baked treats for noshing. One night he picked up a rustic Italian peasant bread with a sturdy crust and we decided to make toasted Cuban sandwiches using some boneless pork chops that I had been marinating in the fridge.

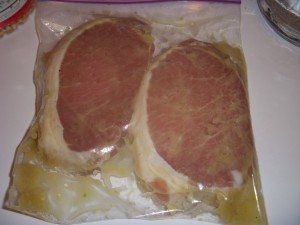
My method for marinating pork chops is really simple. I liberally sprinkle salt and pepper on both sides of two boneless pork chops and place them in a quart sized Ziploc bag. I drizzle some extra virgin olive oil into the bag, enough to coat both chops. Then I use a garlic press and squeeze two medium sized cloves directly into the bag and add the leaves from one small sprig of rosemary. I seal the bag with just a tiny bit of air inside and squish everything all around for a minute or so, making sure all the seasoning and herbs are dispersed evenly on both pork chops. Leave for a few hours or overnight in the fridge.

Marinating pork chops

Marinating pork chops

To cook the pork chops, simply put them on a skillet that has been heated on medium high heat. Cook through on one side, then flip over and cook the other side. The olive oil from the marinade is enough to prevent the pork chops from sticking, so you don’t need to add more oil. The resulting pork chops are seasoned throughout and perfectly juicy from the marinade permeating through the meat.

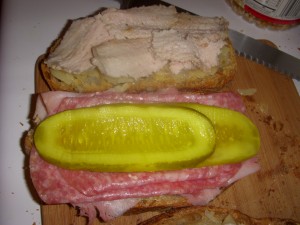
To make the Cuban sandwiches, we cooked up the pork chops and sliced them into thin strips. I slathered some mayo on one piece of sandwich bread, and yellow mustard on the piece. Then I piled on deli ham, salami, the pieces of pork chop, sliced pickles, and swiss cheese. I closed the sandwich, pressing down hard so that it would hold together, and brushed some olive oil on the outside of both slices of bread.

Constructing the Cuban sandwiches

Constructing the Cuban sandwiches

We don’t have a panini press in our apartment so I simply heated the oven to 375 degrees with my pizza stone inside. Once it was heated, I put the sandwiches directly on the stone, topped them with a piece of aluminum foil, and placed a heavy cast iron griddle on top, pushing down hard on the sandwiches. If you don’t have a griddle you can use a heavy pot or a cookie sheet weighed down with a few oven safe pots/pans.

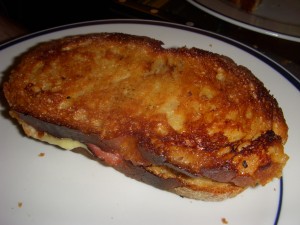
Once the sandwich was nice and toasty and the cheese completely melted, we were ready to eat. The Italian bread was a nice change from the usual Cuban bread, though it was a bit harder and crunchier in texture.

Heat up the sandwich so that the bread gets nice and toasty brown

Make sure the bread gets nice and toasty brown

I drew my inspiration for the fillings from Margon, as salami isn’t always a traditional ingredient. For a homemade version of the Cuban sandwich, I thought it tasted pretty good and was really quick and easy to make.

Autopsy shot

Autopsy shot

Amy’s Bread (multiple locations)
672 9
th Ave. between 46th and 47th St.
New York, NY

NC – Cooking at Home

Tuesday, November 24th, 2009 by virginia

My brother and sister-in-law are very hospitable hosts and they prepared a really delicious lunch for us after we got back from church on Sunday afternoon. My brother grilled up some awesome filet mignons and hot dogs while my sister-in-law made garlicky and tasty mussels.

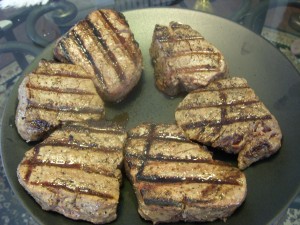
For the filet mignons, my brother used Paula Deen’s house rub recipe to season the steaks. The rub is just salt, pepper, and garlic powder, and is really flavorful despite the simple preparation.

DSCN2288

Simply seasoned and grilled filet mignon

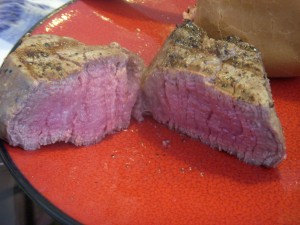
He cooked it for just a few minutes on the bbq grill and it was a perfect medium rare.

Flavorful and juicy steak

Flavorful and juicy steak

For the hot dogs, he slathered them with a spicy chili sauce, ketchup, and soy sauce mixture and then grilled them, which gave them a nice kick and an Asian twist on flavor.

Hot dogs covered in a spicy chili sauce and then grilled

Hot dogs covered in a spicy chili sauce and then grilled

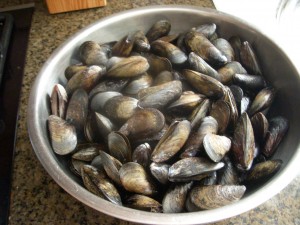
To prepare the mussels, we scrubbed and de-bearded them, making sure to discard any that appeared dead or had cracked shells.

Huge bowl of mussels ready to be cooked

Huge bowl of mussels ready to be cooked

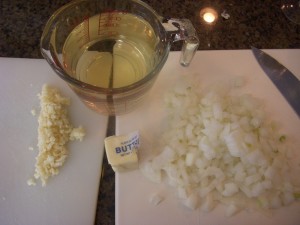
Then we chopped up one small onion, a couple of garlic cloves, and measured out some butter and white wine.

Garlic, white wine, onions, butter

Garlic, white wine, onions, butter

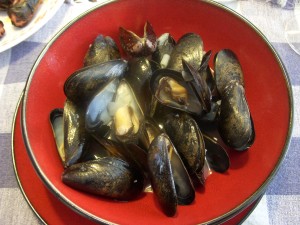
My sister-in-law then sauteed the onions and garlic for a little bit before adding everything into a huge stock pot, letting the mussels gently steam open. The result was a huge bowl of garlicky mussels with lots of flavorful broth in which we dipped toasted pieces of bread. Yum!

Delicious steamed mussels with garlic and white wine

Delicious steamed mussels with garlic and white wine flavor

Corn on the Cob, Fun with Leftovers

Thursday, November 19th, 2009 by virginia

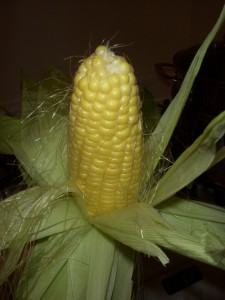
We were feeling particularly lazy this evening so we decided to have a simple meal of steamed corn on the cob. This was the corn we picked up at the greenmarket a few days earlier, and it was quite possibly the best corn I’ve ever eaten.

Huge pile of fresh picked corn

Huge pile of fresh picked corn

Since the corn was super fresh, we didn’t want to take away from the flavor of the corn. We simply boiled a little water in the bottom of our pasta pot and placed the shucked corn into the pasta basket insert, then let it cook for about 10-15 minutes until the kernels were tender but still crisp.

Shucking the corn for steaming

Shucking the corn for steaming

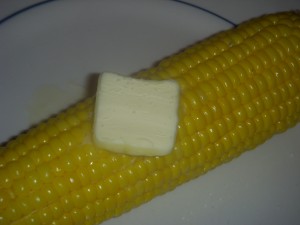
A little pat of butter, a sprinkling of kosher salt; that was all this corn needed. I don’t usually like corn, but even I couldn’t resist the super sweet kernels just bursting with corn flavor.

Simple and sweet

Simple and sweet

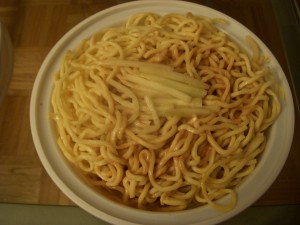
We also had some bland sesame noodles left over from our Lucky Sunday takeout that I revamped. I hate wasting food so whenever we order something that doesn’t have much flavor, I’ll try to figure out a way to “fix” it rather than throw it away.

In keeping with an Asian theme, I tossed the noodles into a pan with a dash of soy sauce and a spoonful of garlic chili sauce. I let that warm through, and then I tossed some chopped up kimchi on top. I took the pan off the stove and mixed everything together, so that the heat from the noodles warmed up the kimchi but didn’t make it limp or soggy. Between the kimchi and the garlic chili sauce, the noodles packed a lot of heat and it definitely did not wimp out on flavor. I thought it was a great improvement to the bland noodles, and I was happy to not waste any leftovers!

From this:

Bland cold sesame noodles

Bland cold sesame noodles

To this:

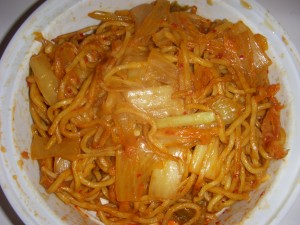
Hot and spicy noodles with kimchi

Hot and spicy noodles with kimchi

Potato Leek Soup

Wednesday, November 18th, 2009 by virginia

On Wednesdays and Saturdays on the NE corner of 57th St. and 9th Ave., there’s a little greenmarket that features fresh produce and delicious-looking baked goods. After brunch one Saturday we decided to take a quick look at what vegetables they had and walked away with a huge bunch of gorgeous leeks and some freshly picked corn on the cob.

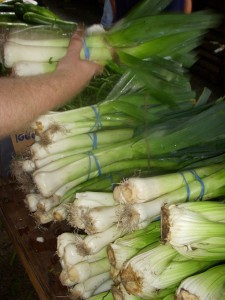
Gorgeous fresh leeks

Gorgeous fresh leeks

What to do with a big pile of leeks? Make potato leek soup, of course. The recipe for this just doesn’t get any easier. Basically I just use one small/medium potato per leek. If I only have large potatoes on hand, I’ll use two potatoes for every three leeks. But honestly, it really doesn’t matter. If you like a stronger leek flavor, use more leeks. If you prefer a heavier potato flavor, use more potato. Either way it’s really hard to mess up this soup.

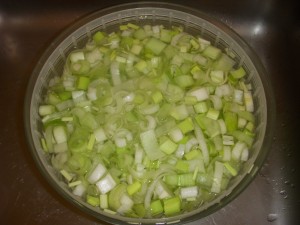
Cut off the roots and the dark green parts of the leeks, then cut it in half lengthwise. Chop the leek into about half inch pieces (doesn’t have to be perfect or even), and rinse thoroughly. I make sure all the pieces are separated as dirt can get trapped between the leaves. I usually do this in the basket of my salad spinner, then spin it dry afterward. Also peel the potatoes and chop into about 1 inch chunks.

Chopped leeks soaking in the salad spinner

Chopped leeks soaking in the salad spinner

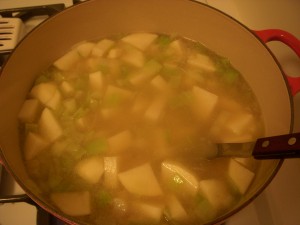
Put two tablespoons of butter or olive oil, or one tablespoon of each, it doesn’t matter, in a soup pot (I always use my dutch oven) and heat on medium high. When it gets hot and starts to shimmer, add in the leeks and sauté for several minutes until the leeks are soft. Then add the potatoes and pour in one quart of chicken stock. I use low sodium because I prefer to season the soup myself. If you think there isn’t enough stock to cover everything, just add some water. Cook everything in the pot, covered, until the potatoes are soft and starting to fall apart, about 30 minutes.

Boiling the potatoes and sauteed leeks in chicken stock

Boiling the potatoes and sauteed leeks in chicken stock

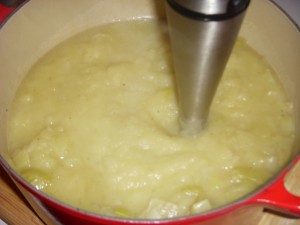
I use an immersion blender to puree the soup. Make sure the blender is completely submerged before turning it on, otherwise you can really hurt yourself with the splatter. If you don’t have an immersion blender, you can use a regular blender and puree it in batches, but please be sure to read up on the proper technique of blending hot liquids as you can really burn yourself if you don’t do it correctly.

Blending the soup with the immersion blender

Blending the soup with the immersion blender

After the soup is completely blended (I prefer my soup smooth, though you can leave it a bit chunky if that’s how you prefer it), you can add some heavy cream for some richness. A half a cup is fine, or you can use none if you want to keep it light. Season with salt and pepper to taste.

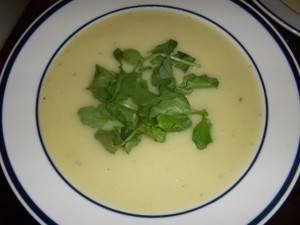
To serve, simply ladle the soup into a bowl and top with a garnish of parsley or chives. I had some leftover watercress that was about to turn so I just chucked a handful on top. Delicious! The watercress was crispy and a little bitter, which complemented the smooth richness of the soup perfectly.

Creamy soup topped with crunchy watercress

Creamy soup topped with crunchy watercress

This soup really couldn’t be simpler to make and is a quick and filling meal on its own, or it can be dolled up to make an elegant starter to any dinner party.

The Greek Kitchen

Wednesday, August 26th, 2009 by virginia

DSCN1990

The Greek Kitchen is Greek restaurant (duh!) near our apartment that we’ve passed by many times. I’ve been craving mediterranean food a lot recently so I was eager to try it out. The restaurant is much bigger than it looks from the outside and is kind of rustically decorated like an actual taverna in Greece. The dining room wasn’t very crowded on this rainy evening so we were able to snag a table in the corner next to the window.

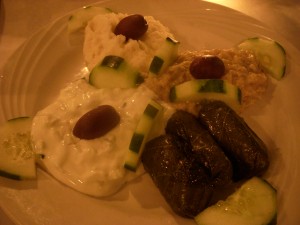
We started off with a bottle of Greek red wine, a cabernet-merlot mix from Dimitra wines. We’re not the hugest fan of Greek wines but this bottle was pretty drinkable. We also ordered an appetizer platter to share, the pikilia, which is a choice of any four cold appetizers. We opted for tzatziki (yogurt, cucumber, garlic, dill), skordalia (potato, garlic), melitzanosalata (eggplant, garlic, olive oil, lemon), and dolmades (stuffed grape leaves).

Tzatziki, skordalia, melitzanosalata, and dolmades

Tzatziki, skordalia, melitzanosalata, and dolmades

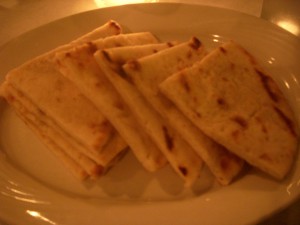
The three dips were all nicely seasoned and packed good garlic punch. I also really liked the warm pieces of pita bread they brought us to eat the dips with. After we ran out of bread, they gladly brought us more. The stuffed grape leaves were also pretty tasty and not too greasy, which is a problem I often find with grape leaves at other Greek restaurants.

Warm pieces of pita bread

Warm pieces of pita bread

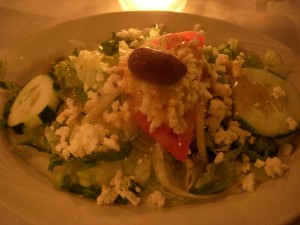
Josh and I decided to split two entrees, lamb shish kebab and a combination platter with gyro, bifteki, and pork souvlaki. Both of our entrees came with a big plate of salad, which they brought out to us first. The salad was mostly lettuce but had a few pieces of cucumber, tomato, and onion on top. It was also covered in feta crumbles, which I liked because it was mild and added a nice saltiness to the otherwise ordinary salad. The dressing was also pretty light and not too vinegary.

Salad topped with pieces of crumbled feta

Salad topped with pieces of crumbled feta

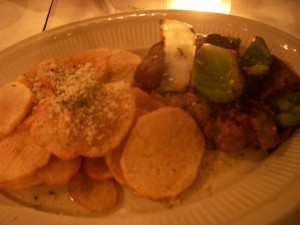
We ordered the lamb shish kebab rare but it was totally overcooked. The pieces were tough and rubbery, which was very disappointing. It had a nice gamey flavor but I couldn’t get over the poor meat. The shish kebab came with a side of Greek fries, which were thin slices of potato seasoned with lemon and oregano and topped with a sprinkling of cheese. These were just ok. They had decent flavor but weren’t really very crispy and were kind of cold.

Lamb shish kebab and Greek fries

Lamb shish kebab and Greek fries

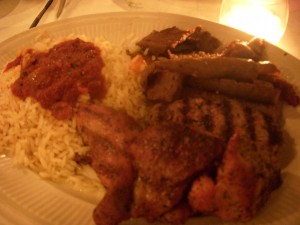
We opted for rice pilaf with our combination platter. The rice was ok, but it was topped with tomato sauce that tasted like it came straight from a jar. Not great. We kind of scraped that off to the side. The gyro though in the combination platter was my favorite meat of the evening. It had a nice char on the outside and the thin slices of meat were really tender. I liked the seasoning in the meat a lot, and made my own gyro sandwiches by wrapping some meat in slice of pita bread and adding a dollop of tzatziki sauce on top. The bifteki was ground beef mixed with onions and tasted like a hamburger patty. Not bad, but not great. The pork souvlaki, however, was really a mixed bag. Most pieces were tough and overcooked, except for one, which was completely raw. Unfortunately, I was the one who ate a bite of the raw piece. Josh had been complaining that the meat was too tough, so I took a piece and had a bite. My piece was surprisingly mushy, and I couldn’t understand why until I flipped it over and it was completely undercooked. Like it was still pink and fleshy. Yikes.

Combination platter with gyro, bifteki, and pork souvlaki

Combination platter with gyro, bifteki, and pork souvlaki

At that point we were both full and didn’t really want anything except the check, so we didn’t say anything. It was clearly an honest mistake, as the rest of the meats were all cooked to a point of overdone-ness, and it was only one piece out of many pieces of meat we had that evening.

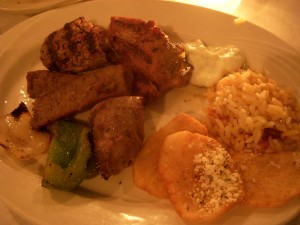
A little taste of everything

A little taste of everything

Overall I wasn’t a big fan of The Greek Kitchen. The appetizer platter was good but it was pretty standard stuff that I can get at any decent Greek restaurant. And I was really disappointed with all of the grilled meats except for the gyro. I’m sorry to say that I’ve had better Greek food from a diner. Plus there are too many other Greek restaurants in this area to settle for mediocre food. I don’t think we’ll be coming back here again.

The Greek Kitchen
889 10th Ave. at 58th St.
New York, NY