Archive for the ‘Recipes’ Category

Fireworks and Food

Saturday, July 4th, 2009 by virginia

Waiting for the sun to set and watching all the boats congregate in the Hudson

Waiting for the sun to set and watching all the boats congregate in the Hudson

The anticipation builds...

The anticipation builds...

Happy July 4th!

Happy July 4th!

Ooh!

Oooh!

Aaah!

Aaah!

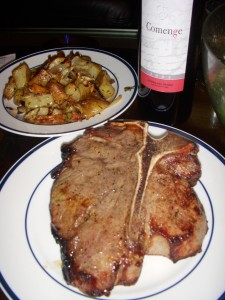
After watching the Macy’s fireworks from our rooftop, Josh made me a delicious meal of steak, roasted potatoes and arugula salad. For the steak, all he did was season it liberally with salt and pepper, and then placed it in the oven on the top rack, near the broiler. The steak accidentally caught on fire but fortunately it went out on its own before we had fireworks in our kitchen!

T-bone steak, post fire(works)

T-bone steak, post fire(works)

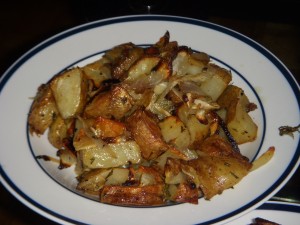
For the roasted potatoes, he added slices of onion and garlic, and seasoned with olive oil, salt, pepper, and fresh rosemary from our windowsill planter. Yum!

Roasted potatoes with onion, garlic, and rosemary

Roasted potatoes with onion, garlic, and rosemary

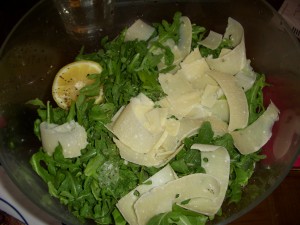
Arugula salad is super simple and a tasty complement to an otherwise rich meal. The peppery, slightly bitter baby arugula is dressed with a squeeze of lemon, a drizzle of olive oil, seasoned with salt and pepper, and topped with slivers of parmesan cheese cut from a wedge using a vegetable peeler.

Arugula salad topped with shaved parmesan

Arugula salad topped with shaved parmesan

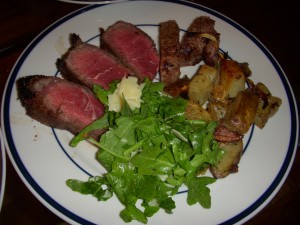
A bottle of full bodied Spanish tempranillo red wine topped off the meal. What a wonderful evening!

A tasty well-balanced dinner

A tasty home cooked dinner

Pretzels and Pretzel Dogs

Saturday, July 4th, 2009 by virginia

I saw this great recipe and fun pictures on Food Mayhem for pretzel dogs, and I knew immediately that I would have to try it out since the recipe had simple ingredients and didn’t seem too time consuming. My only reservation was that I suck at baking. I don’t know why, but I have very little success when it comes to baking, even though it is the only time I follow recipes to the letter. Even my attempts at no-knead bread have failed miserably. Oh well, practice makes perfect, right?

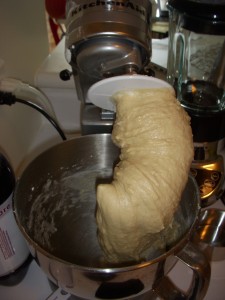
I had all the ingredients on hand and figured there’s no better time to make hot dogs than July 4. I used my often-neglected Kitchen Aid stand mixer to do all the hard work, then set the dough in an oil bowl to rise.

Letting the Kitchen Aid do all the kneading

Letting the Kitchen Aid do all the kneading

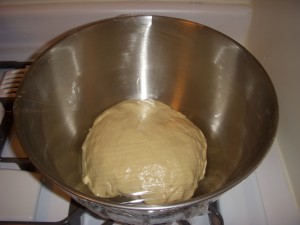
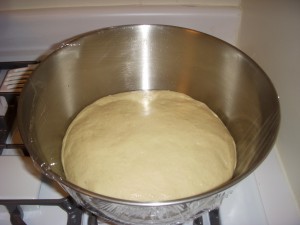
I was surprised that the dough actually did double in size, and my hopes for a successful completion of a baking recipe rose.

First this

Started off at this size...

Now it's double the size!

Now it's double the size!

Next came the fun part – shaping the pretzels and pretzel dogs. I pulled the dough from the bowl and quickly shaped it into a rectangle, taking care not to handle the dough too much. Using a wide flat blade, I cut the dough into 12 pieces, setting aside seven pieces for the number of Hebrew National hot dogs that come in a package (why seven?).

Strips of dough ready to be shaped

Strips of dough ready to be shaped

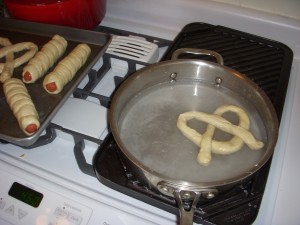
The dough was soft and springy so I just pulled it a bit to stretch it out into long strips; there was no need to roll it into a snake. It took me a little while but I eventually figured out how to form a pretzel without manhandling the dough too much. Then I dipped them into the baking soda water and placed them on the cookie sheet.

Dipping the pretzels in a baking soda/water mixture

Dipping the pretzels in a baking soda/water mixture

For the pretzel dogs, I patted each hot dog dry with a paper towel then twisted the dough around it. I had a few scraps leftover from each that I quickly kneaded together, let rest for a bit, then made into regular pretzels. These turned out to be a bit denser than the other pretzels, but still tasty. Baking took longer than the eight minutes stated in the recipe – it was actually closer to 10-12 minutes. I also found that eating the pretzels right away made them taste too fluffy and bready.

Hot pretzels right out of the oven

Hot pretzels right out of the oven

Once I let them sit and cool down for a bit, they shrank a little and became crispier on the outside and chewier in the middle. The pretzels were also a little too sweet for me (they reminded me of the honey wheat pretzels), so I might cut back on the sugar next time (hopefully that won’t affect the rest of the recipe! Like I said, I suck at baking, and I have no idea how baking works).

Almost ready to eat...

Almost ready to eat...

The pretzel dogs were my favorite. The salty hot dog and the sweet pretzel, plus a dipping sauce of ketchup and mustard, really hit the spot.

Pretzel dog innards - yum!

Pretzel dog innards - yum!

Overall, this is really a great recipe to make, and I even I managed not to mess it up too badly. I actually found that they tasted better reheated. I don’t know if the it’s because of the butter and salt you brush on when they first come out of the oven, but the texture was much crunchier on the outside and chewier on the inside after a quick reheat in a 375 degree oven. I can’t wait to make them for our next cocktail party!

Miso Soup with Tofu Shiratake Noodles

Wednesday, July 1st, 2009 by virginia

I first read about House Food’s Tofu Shiratake Noodles on Hungry Girl and was pretty intrigued by the low calorie/low carb aspect. Obviously I’m far from a carb (or calorie!) counter, but the idea that I could eat an entire package of noodles and not feel guilty about it was an alluring concept. Looking at the package of noodles, however, I knew they probably wouldn’t be good with pasta sauce, so I thought about what goes well with tofu. Miso soup immediately sprang into mind, and I thought we could make a sort of miso pseudo ramen soup that would be filling and nutritious.

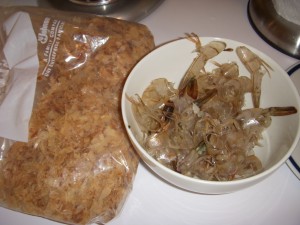
Josh is the miso soup expert in our household, so he took care of making the dashi. He did this by shelling approximately 20 shrimp and boiling the shells in a pot of water with a handful of dried bonito flakes. If you don’t have shrimp on hand, don’t worry about it. If you just filleted a fish and have a fish head or some fish bones, you can throw those in. But they’re also not necessary, they just add a different flavor to the soup. The bonito flakes are important though and you should always have those on hand. You can get them at almost any Asian supermarket.

Bonito flakes and shrimp shells for the dashi

Bonito flakes and shrimp shells for the dashi

Basically just boil all the flavor from the shells and flakes into the water. Keep a lid partially on top so that it doesn’t boil over but all the liquid won’t evaporate too quickly. Check it periodically to make sure you don’t need to add more water. Strain the dashi into a new pot (or you could strain it into a big mixing bowl and wash out the first pot before putting the dashi back in). Season with soy sauce to taste.

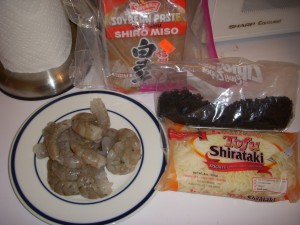
Shelled shrimp, miso paste, wakame seaweed, Shiratake Noodles

Shelled shrimp, miso paste, wakame seaweed, Shiratake Noodles

Now you just throw in whatever ingredients you have on hand. Wakame seaweed is a big favorite of ours. It’s cool to see the tiny pieces of dried seaweed expand into big sheets in the soup. We also usually add cubes of soft tofu, but this time we replaced the tofu with the Shiratake Noodles. These noodles come in liquid so make sure you wash them really well. They have a weird fishy smell when they come out of the package so just beware, but the smell goes away after a few thorough rinses. These noodles are also super long so I use scissors to cut them in half. Not necessary, but makes them easier to handle when you eat them.

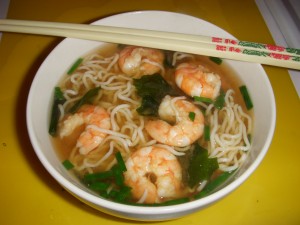
Sprinkling of fresh chives on top of the finished noodle soup

Sprinkling of fresh chives on top of the finished noodle soup

We threw the shrimp in last minute so they don’t overcook and get rubbery. As soon as they turn pink, which is pretty quickly, they’re ready to eat. Top with fresh chives or scallions, and enjoy!

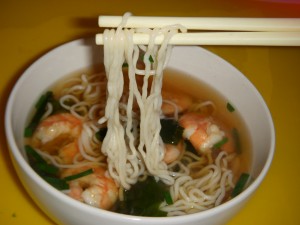
Close up of the Shiratake Noodles

Close up of the Shiratake Noodles

This miso soup with Shiratake Noodles really makes a quick, healthy, and filling meal. The noodles have kind of a bouncy texture to them, but you can cook them forever and they’ll still be a bit “crunchy”. The weird texture makes them not ideal for pasta sauce, in my opinion, but in soup, they’re kind of like ramen noodles. They even have the same curly look to them. I don’t think of them as a replacement for regular noodles, but they’re nice to have once in a while and I don’t feel as guilty stuffing my face. Try them out sometime – just don’t be put off by the weird smell at first. They’re actually pretty good, and good for you.

Stuffed Artichokes

Monday, June 1st, 2009 by virginia

While we were at Whole Foods in Paramus picking up a few last minute supplies for the Memorial Day BBQ, I saw a beautiful display of large, bright green artichokes and couldn’t resist picking up two. I’ve never cooked artichokes before, but I’ve been craving the deliciously garlicky version of stuffed artichokes from Carmine’s. I didn’t have a recipe handy though, so I just looked up a few on the internet and improvised, playing up the flavors I like best (garlic, parmesan, lemon).

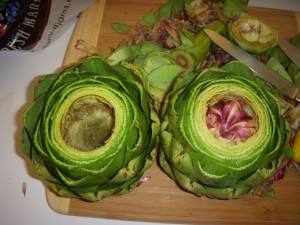
I had no idea how to clean the artichoke, so I ended up cutting off about an inch from the top to remove most of the spiky tips, cut off the stem so that the artichoke would sit up by itself, and used a spoon to get out as much of the stringy choke from the middle. That was the hardest part, and I know I left a lot of it, but in the end it didn’t make much of a difference.

Cleaning out the artichokes

Cleaning out the artichokes

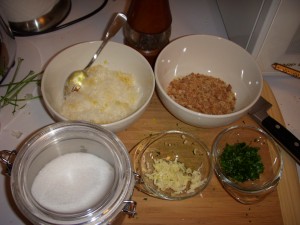
For the stuffing, I combined about a cup of breadcrumbs with half a cup of grated parmesan cheese, two large cloves of minced garlic (I used a garlic press to get a finer mince), approximately two tablespoons of minced fresh parsley, the zest of two lemons, and salt and pepper to taste.

Salt, grated parmesan, lemon zest, bread crumbs, parsley, and garlic

Salt, grated parmesan, lemon zest, pepper, bread crumbs, parsley, and garlic

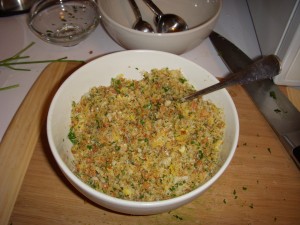
Then I drizzled in a bit of olive oil to form a thick paste out of the mixture.

Stuffing for the artichokes

Stuffing for the artichokes

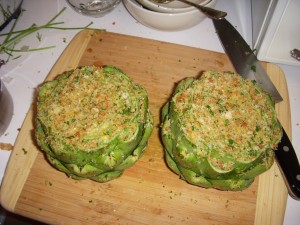
Then came the fun part – stuffing the artichokes. I pried the leaves apart and just used my fingers to smush in as much of the mixture as I could, making sure to get it between every leaf. After all the leaves were full, I spread the leftover stuffing over the top of the artichoke.

Stuffed artichokes ready to be cooked

Stuffed artichokes ready to be cooked

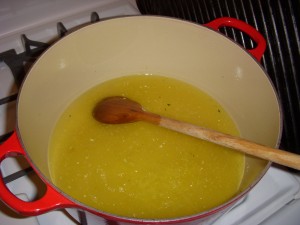
In my dutch oven, I heated up a few tablespoons of olive oil (enough to cover the bottom of the pot) and tossed in four cloves of minced garlic. I stirred that around for about a minute (make sure the heat isn’t too high so the garlic doesn’t burn), then added 1.5 cups of white wine, 1 cup of chicken broth, and the juice of the two zested lemons. I also threw in a sprig of thyme for some extra flavor.

Cooking liquid for the artichokes

Cooking liquid for the artichokes

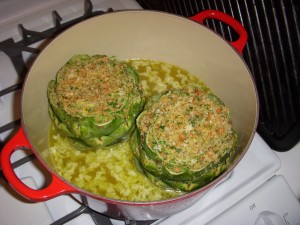
Place the artichokes in the dutch oven, cover, and simmer over medium heat. I kind of lost track of time as to how long I heated it, but it was a little over an hour. I checked on it periodically, making sure all the liquid hadn’t evaporated, and tugged a little on the outer leaves to check how tender they were.

Artichokes cooking in the dutch oven

Artichokes cooking in the dutch oven

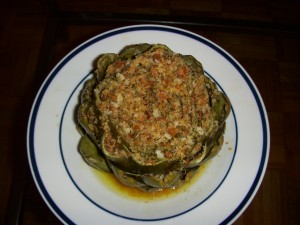
I pulled them out when the leaves started pulling out very easily, and then I reduced down the remaining liquid and seasoned with salt and pepper. I poured the reduced liquid into two wide rimmed bowls, then topped with the stuffed artichokes.

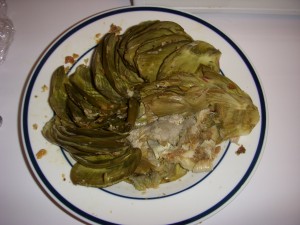
Artichoke presented with the reduced cooking liquid

Artichoke presented with the reduced cooking liquid

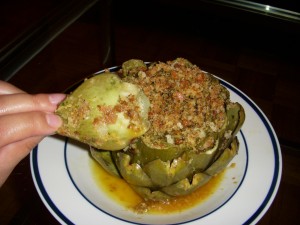
To eat, simply pull off a leaf, making sure to get a bit of stuffing, dip the root end in the liquid, and scrape the edible portion off with your teeth.

Artichoke leaf with stuffing on top

Artichoke leaf with stuffing on top

When you finish all the leaves and get down to the heart, scrape off the remaining choke, and enjoy!

Artichoke remains

Artichoke remains

For my first attempt, I think it was a pretty successful version, though still not as tasty as the one from Carmine’s. Next time I think I’ll add more garlic for a bigger flavor punch.

Tilapia Cakes

Tuesday, May 26th, 2009 by virginia

Tilapia cakes are a great stand-by recipe for Josh and me. We always have some frozen tilapia filets on hand, and this makes a quick, cheap and simple appetizer or meal. The ingredients vary, depending on what we have on hand. Basically, you just need tilapia (2-3 filets for two people), garlic (or garlic powder), any form of onion (regular, scallion, shallot), peppers (any color, or leave out entirely), lemon or lime, breadcrumbs, an egg, and salt and pepper.

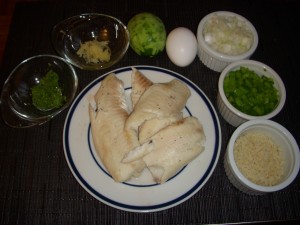
Poached tilapia, lime zest, garlic, lime, egg, onion, green pepper, bread crumbs

Poached tilapia, lime zest, garlic, lime, egg, onion, green pepper, bread crumbs

I just poach the filets for a few minutes in salted water, then drain and flake in a mixing bowl. I like garlic, so I usually mince 2 cloves, but the amount is really up to you. Then I finely dice the onion (one small or half a large is plenty) and pepper (same amount as the onion), zest one lemon or lime, and reserve the fruit for squeezing over the top of the cakes after they are cooked. Mix it all together, and season with salt and pepper.

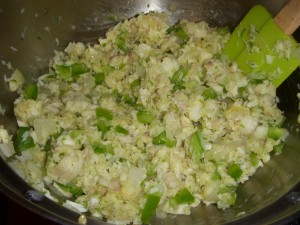
All the ingredients mixed up together

All the ingredients mixed up together

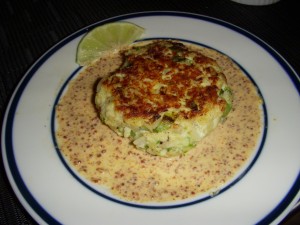
Since the fish is cooked after poaching, this is when I taste for seasoning. Then I throw in an egg to bind it, and some breadcrumbs if it needs some filler to hold it all together. Mix well, then form and shape into patties. The size is up to you, but usually we’ll get four hamburger-sized patties from the mixture. We’ve also made smaller appetizer portions, and even smaller bite size portions for a cocktail party. To cook, cover the bottom of a pan with a thin layer of neutral oil (i.e. vegetable or grapeseed), and heat over medium high heat until it is shimmering and just starting to smoke. Then simply fry the patties until they have a nice golden crust.

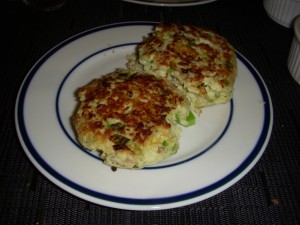
Pan fry the patties until golden brown on each side

Pan fry the patties until golden brown on each side

To make a quick sauce for the cakes, I mixed together whole grain mustard, sriracha and mayo. Josh also sometimes mixes sesame oil and mustard for an Asian flare. Again, it’s up to you. Spread the sauce on a plate, place the cake on top, and squeeze the lemon or lime over the whole thing. Dressed up or dressed down, it’s really an easy meal to make and can be fancy enough to entertain with.

Bon appetite!

Bon appetite!

Chocolate Covered Strawberries and Pineapple

Sunday, May 24th, 2009 by virginia

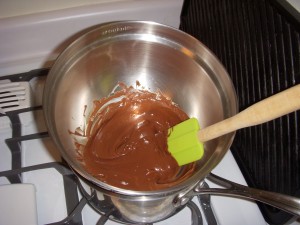
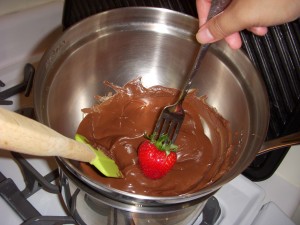
We also had a bottle of prosecco in the fridge calling our names so we whipped up a quick chocolate “fondue” with strawberries and pineapple to pair with the sparkling wine. We simply created a double boiler with a pot of water and a metal mixing bowl, and threw in a few pieces of a giant Hersheys bar, stirring until it melted.

Melted Hershey bar

Melted Hershey bar

DSCN8227I made a few chocolate covered strawberries to put in the fridge for later, and then we ate the rest with the prosecco. Quick, easy and delish!

Yummy, but I forgot to grease the plate before I set these down and they got stuck - fail!

Yummy, but I forgot to grease the plate before I set these down and they got stuck - fail!

Fun With Leftovers

Wednesday, May 20th, 2009 by virginia

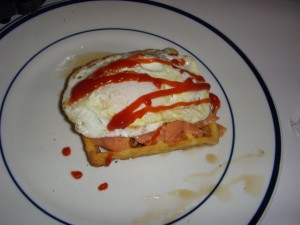
Josh had a work thing for dinner so I was left to my own devices. Usually when he’s not around, I just eat whatever is hanging out in the fridge. This time I found some waffles and smoked salmon left over from our anniversary brunch so I decided to experiment a bit with different flavor combinations. I’ve already mentioned my love for sweet and salty together, so I toasted the waffle in the oven until super crispy, then squeezed a healthy portion of maple syrup over the top. Then I layered on the smoked salmon, and topped it off with an over easy egg (yolk still runny, of course!). Then to add a whole new dimension of flavor, I squirted Sriracha and ketchup over the egg.

Waffle layered with maple syrup, smoked salmon, a sunnyside up egg, ketchup, and sriracha

Waffle layered with maple syrup, smoked salmon, a sunnyside up egg, ketchup, and sriracha

I must admit, it didn’t look so great, and I was a bit nervous about mixing the maple syrup with the Sriracha, but it turned out awesome!! I could taste each layer individually, and the combinations really worked harmoniously. The spice of Sriracha was tempered by the ketchup and syrup, the crunch of the waffle contrasted well with the softness of the salmon, and the whole thing was bound together by the runny egg yolk mixing in with everything. This is definitely something that I will make again.

Looks gross but tastes great!

Looks gross but tastes great!

Home Cooked Anniversary Brunch

Sunday, May 17th, 2009 by virginia

After discovering that our anniversary would fall on a Sunday, and that none of the restaurants on our list of “top places to try” would be open, I tried to opt for a more sentimental route to celebrate our first year as a married couple. On our honeymoon, we spent eight days in Egypt and eight days in Greece, splitting our time exploring two ancient civilizations and eating many great things along the way. For dinner, I knew I wanted to try Kefi, a Greek restaurant on the upper west side that has received several good reviews and features a menu packed with items I love to eat. Trying to find an Egyptian restaurant in Manhattan for lunch, however, proved to be a more daunting task.

Yes, I know there are several Egyptian restaurants in the outer boroughs that have received rave reviews and have been touted by Robert Sietsema, for example, but let’s face it – we’re both too lazy to trek out of Manhattan on a Sunday morning. (Or any time, really. We need to get over that, as I know we’re missing out on a lot of good eating.) The only place that came up in my search online was the Horus Café on East 10th and Avenue A, which had standard Middle Eastern fare (kebabs, hummus, shawarma, etc.) listed on its menu. I must admit that I was intrigued by the “Cairo Falafel,” as the best falafel I’ve ever eaten was at the breakfast buffet at the Grand Hyatt Hotel in Cairo. Egyptian falafel is made with fava beans rather than chickpeas, which I found to be tastier and more moist than versions here in the U.S. And fortunately for us, every falafel we had in Egypt was freshly fried, resulting in a smooth, almost creamy interior, with a hot and crispy outer layer. Many places shaped their falafel like miniature donuts, which presented even more surface area to crisp up.
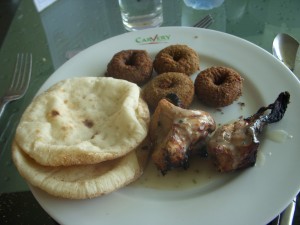
Falafel donuts at the Carvery restaurant in Cairo

Falafel donuts at the Carvery restaurant in Cairo

I was hoping that the Horus Café’s falafel would be made in similar fashion. But, as Josh pointed out, there was nothing else that stood out on the menu, and the “Sizzling Lamb Fajita” served with tortilla, guacamole, salsa and sour cream certainly does not sound Egyptian. So instead, we decided to sleep in, cook up our own brunch and pop open a bottle of champagne that we’ve been saving.

When it comes to breakfast/brunch foods, I tend to favor the savory items. But, that doesn’t stop me from stealing bites of someone else’s french toast or pancakes or waffles, especially when they’re covered in fruit and whipped cream or contain chocolate chips. I like a combination of salty and sweet, so when it came time to pick the menu for our brunch, I opted for bacon, smoked salmon eggs benedict (minus the hollandaise) and waffles.

Bacon – a no-brainer. I just laid out the strips on our flat top griddle and cooked them until very crispy. Despite Josh’s protests, I wanted turkey bacon because I knew we would end up eating the whole package, and turkey bacon just seems healthier, even though it’s really not that much better for you. Believe me, I don’t have anything against regular bacon, but for this meal, the bacon was just a sideshow.
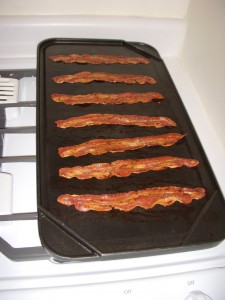
Turkey bacon cooking on the griddle

Turkey bacon cooking on the griddle

The smoked salmon eggs benedict were easy enough, and something that we’ve prepared many times before. We toasted english muffins in a 425 degree oven, poached a few eggs in boiling water with some red wine vinegar mixed in, and then layered it all together with some store-bought smoked salmon. We added a sprinkling of fresh dill from our windowsill planter, which really brightened everything up.
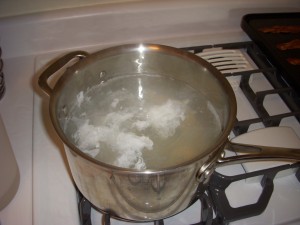
Eggs poaching in vinegar and water

Eggs poaching in vinegar and water

Now for the main event: waffles. We received a waffle iron as a wedding present and it’s been sitting in our cabinets ever since. I recently read about a waffle recipe via The Girl Who Ate Everything that I’ve been wanting to try, so this presented the perfect opportunity.
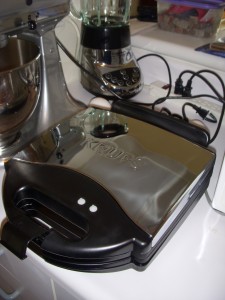
Shiny new waffle iron just waiting to be used

Shiny new waffle iron just waiting to be used

The verdict: so-so. I loved the texture of these waffles – they were light and airy and extremely crispy. However, even when drenched in syrup, they didn’t provide the sweet aspect that I was looking for, as the recipe doesn’t contain any sugar. And too much syrup made the waffles soggy, negating the crispy aspect that I loved so much. With a few minor tweaks, I think it could be a really great recipe. Just a side note – be sure to really butter up your waffle iron and get in between the grooves! I thought I used enough butter on the first batch and my waffles got stuck – fail!

Broken waffles

Broken waffles fail

But overall, it was a really satisfying and relaxing brunch for us eaten at our coffee table in front of the TV. We enjoy cooking and experimenting with recipes, and we didn’t have to deal with the crowds and the waiting that is often associated with the Manhattan brunch scene. And the bonus is that I didn’t have to feel embarrassed about wanting to order two different entrees to satisfy both my salty and sweet cravings.

DSCN8055

A yummy home cooked brunch and unbroken waffles