As you may remember, Josh got me an entire lobe of foie gras for our anniversary/Valentine’s Day. We portioned it out into slices and froze it for future use. These days, it’s still pretty rare for us to have an obligation-free Saturday to ourselves, especially with a baby that demands every little bit of our attention. So when the opportunity came up for us to spend our day in leisure, we jumped at the chance to cook up some more foie gras. I was particularly inspired by our foie gras-filled trip to Quebec City/Montreal, so I was excited to taste the preparation that Josh whipped up.
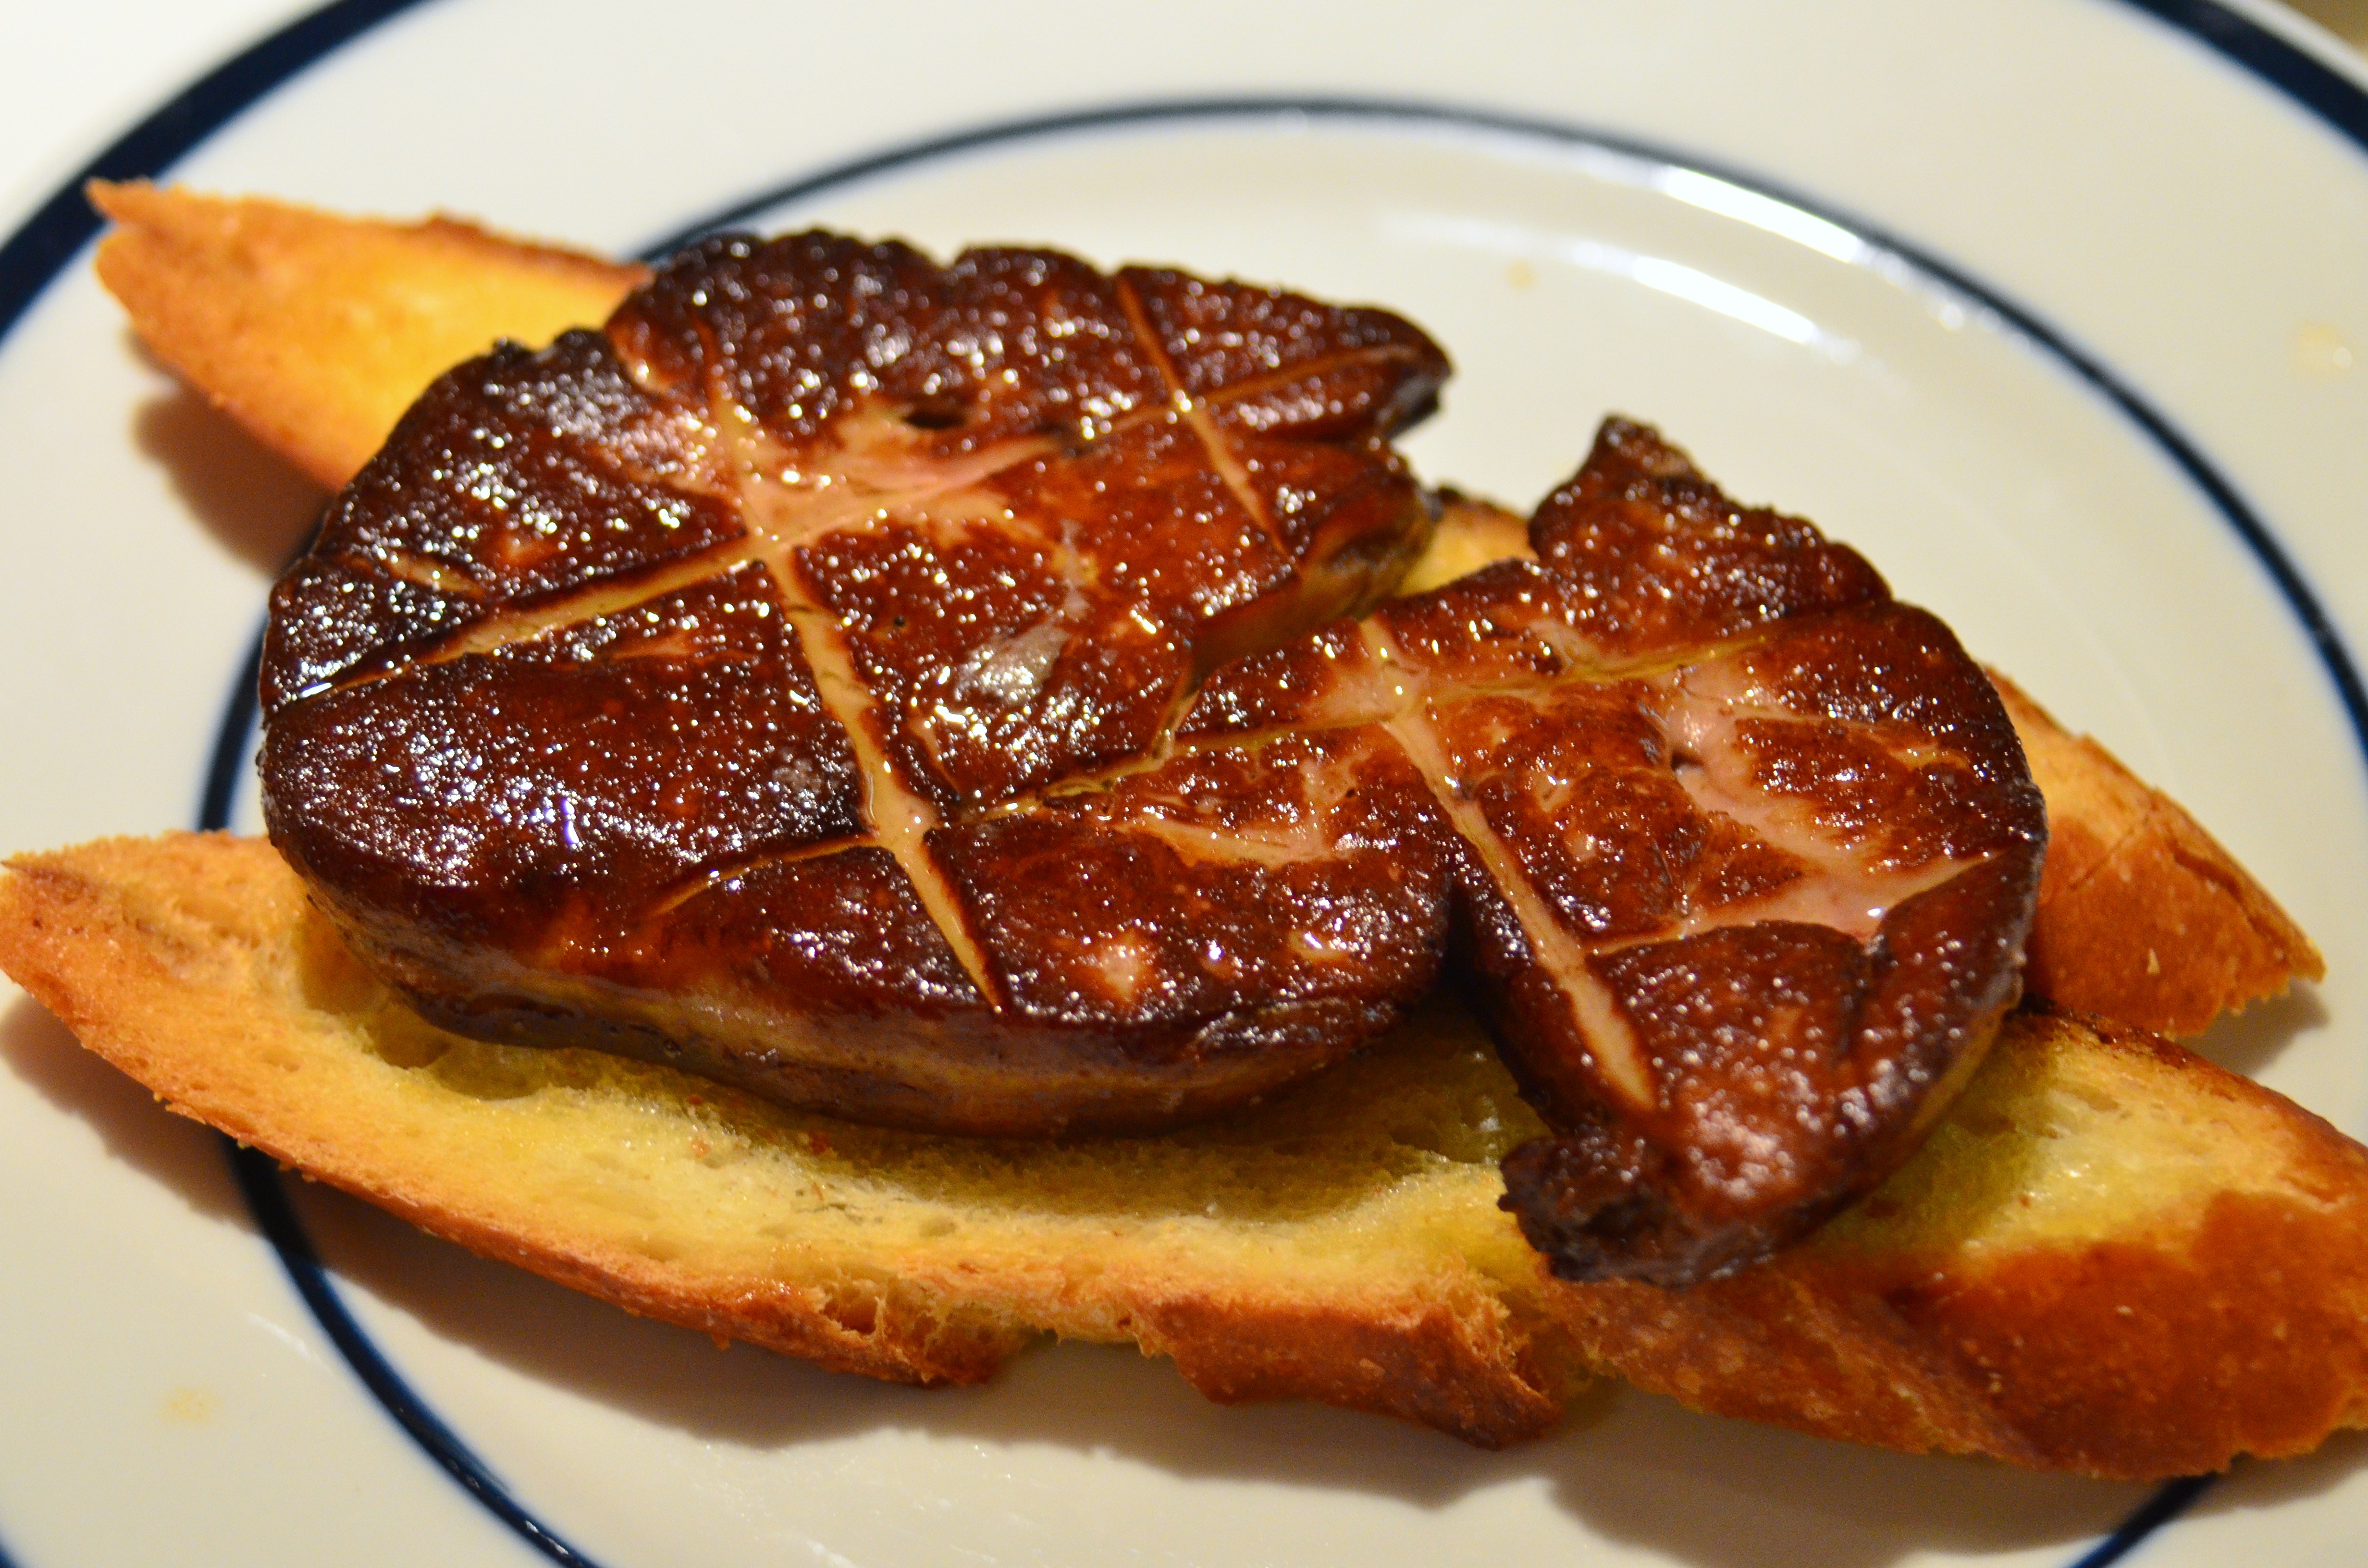
The first time he cooked foie gras for me, Josh just simply seared the slices with oil, salt, and pepper, and then deglazed the pan with aged balsamic vinegar. It was tasty, but he wanted to try making a different kind of sauce for this occasion. Basing the ingredients on this recipe, after searing the foie gras and reserving the excess fat, he added minced garlic and shallots, and then deglazed the pan with balsamic vinegar and port wine. Learning from our previous experience, he did not add oil to the pan before searing the foie gras, which made the slices less greasy, but no less rich than before.
The end result was fantastic – a luscious slice of foie gras with a delicately crispy exterior and a creamy interior that just melted in my mouth. The port wine and balsamic added both sweetness and acidity to cut through the fat, while the garlic and shallots helped round out the umami flavor and provided a little texture to the sauce.
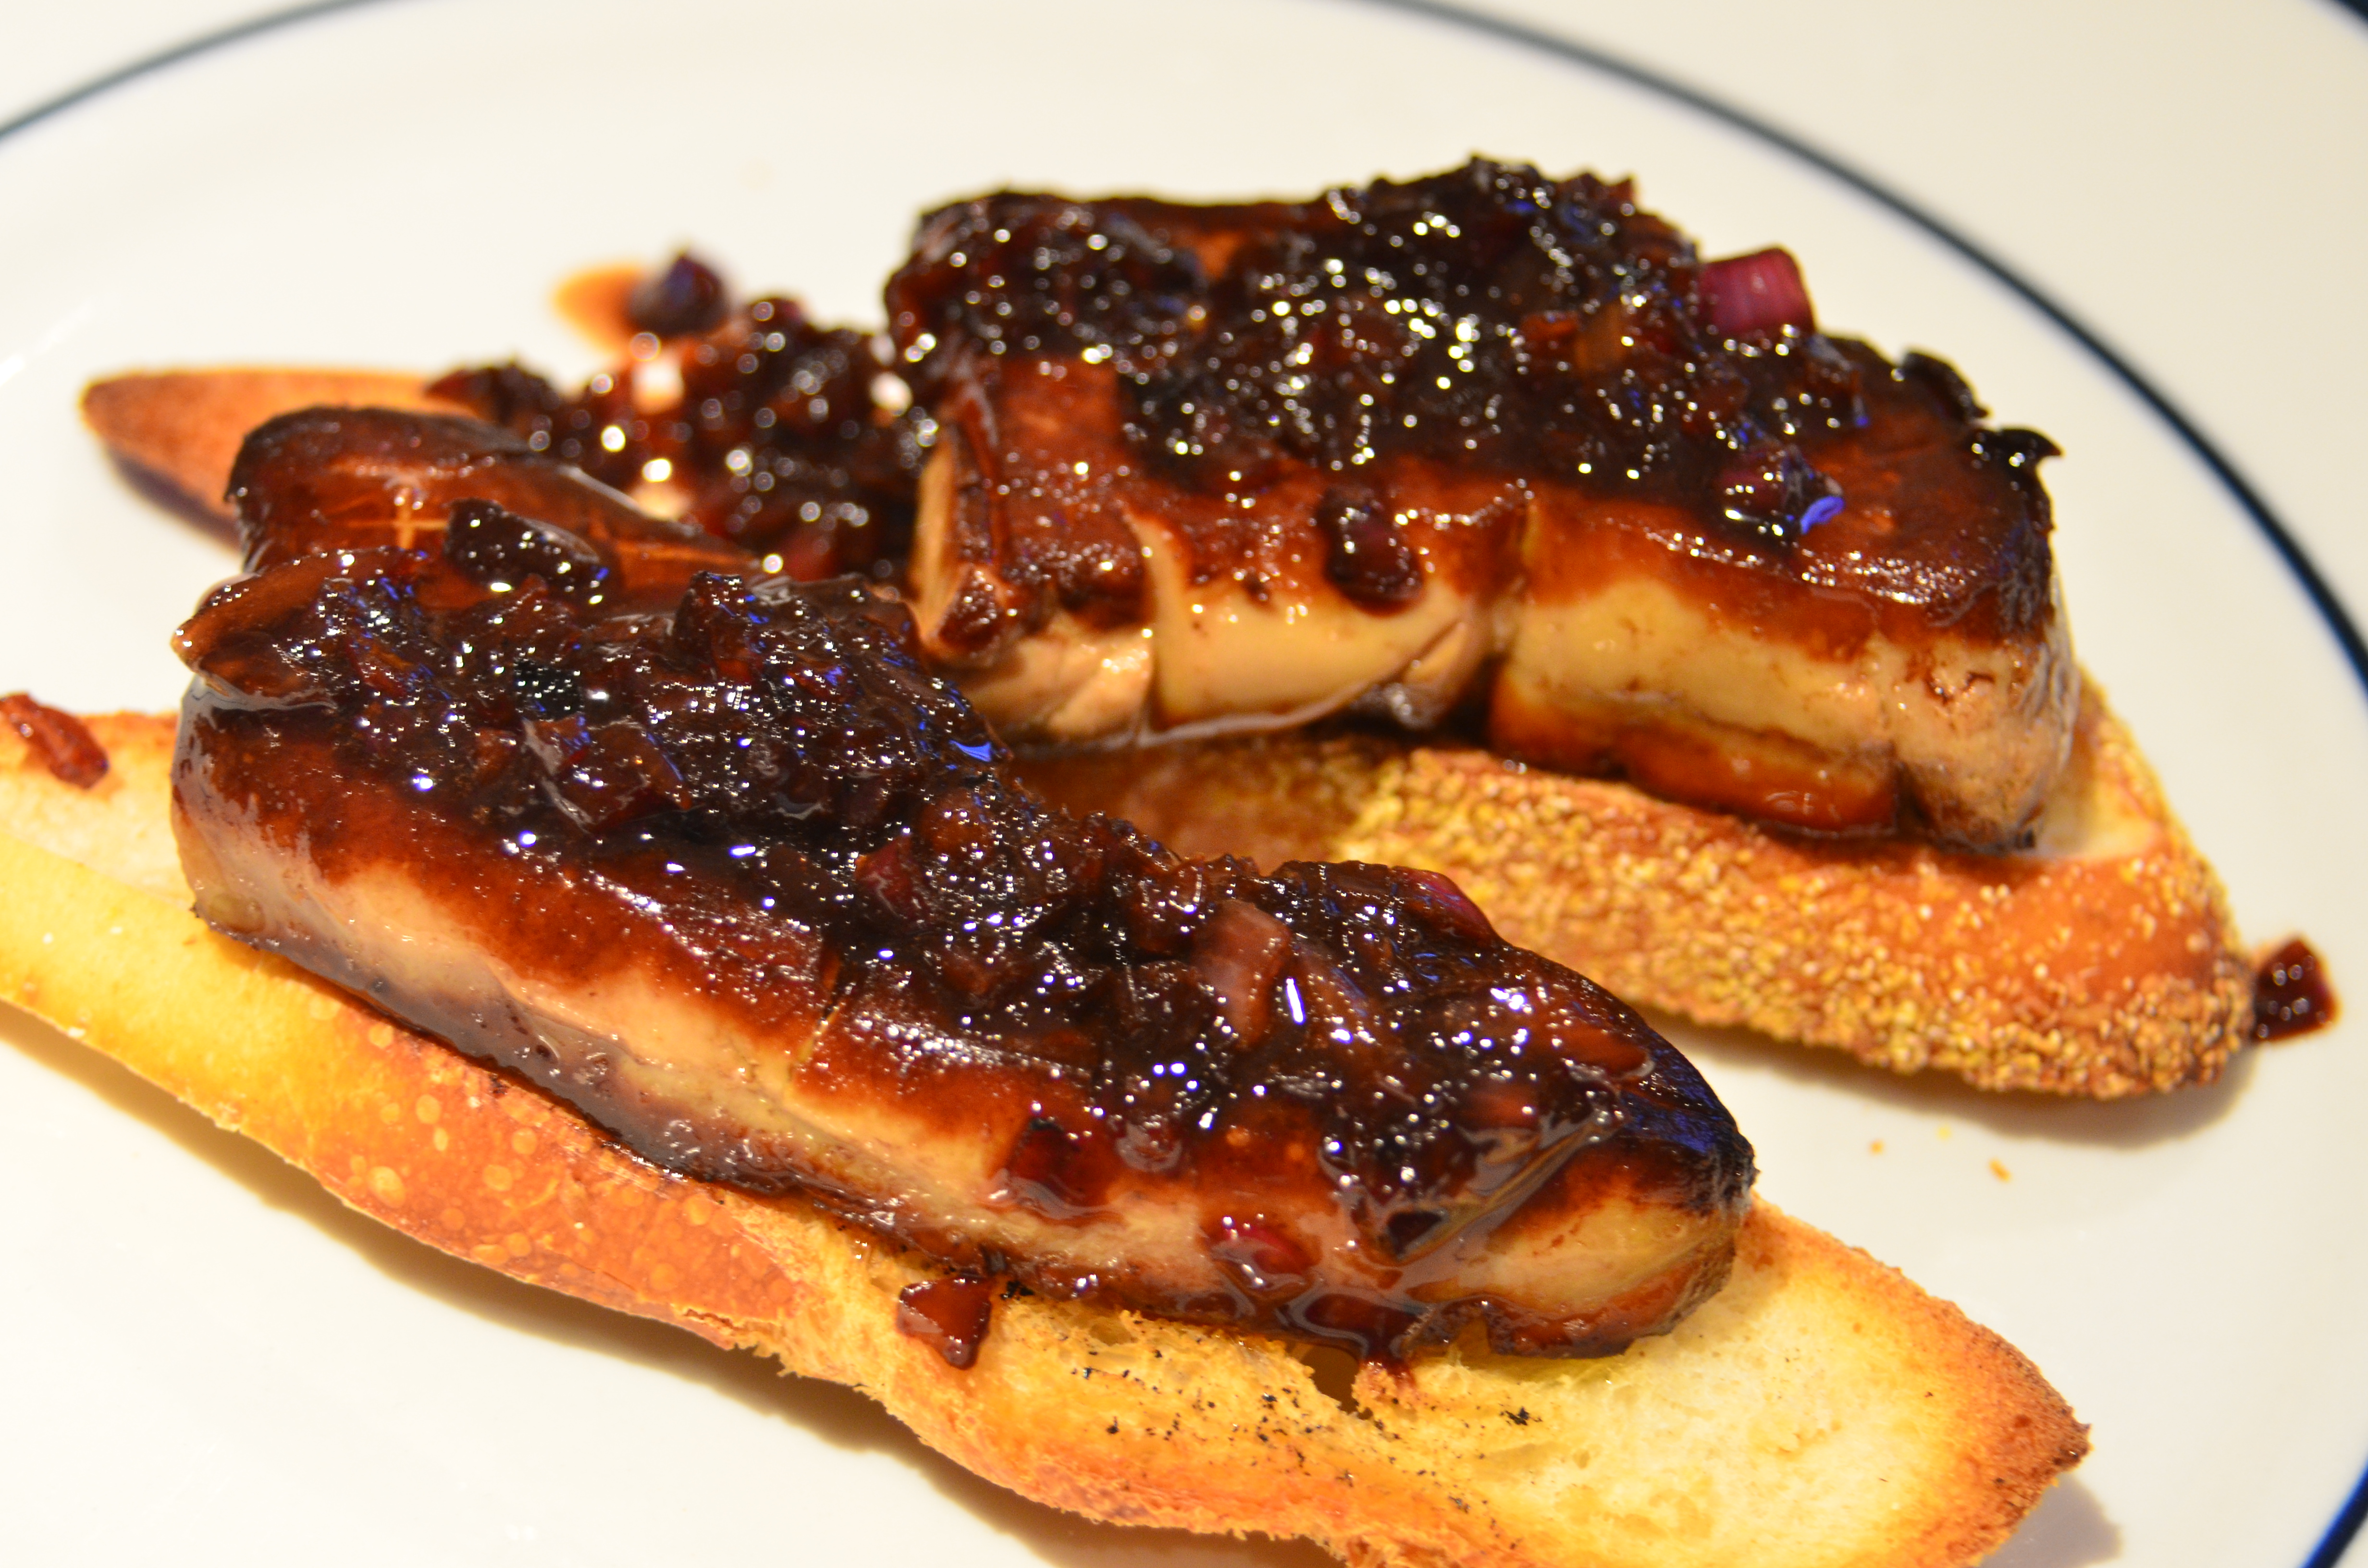
Seared foie gras with port wine, balsamic, garlic, and shallot reduction
Since we were unable to use the reserved fat that came off the foie gras the first time we made it, we decided to use this batch immediately. We tossed the fat with diced potatoes and roasted them in the oven. However, this meant that we had to wait a while for the potatoes to cook through to serve with our main course. In the interim, we snacked on some prosciutto and crenshaw melon topped with balsamic syrup. We saw the crenshaw melon while we were shopping at Fairway, and Josh couldn’t resist trying it out. The flesh looks like canteloupe but the flavor is actually closer to honeydew. It was sweet but I thought that the aftertaste was slightly too acidic for my preference.
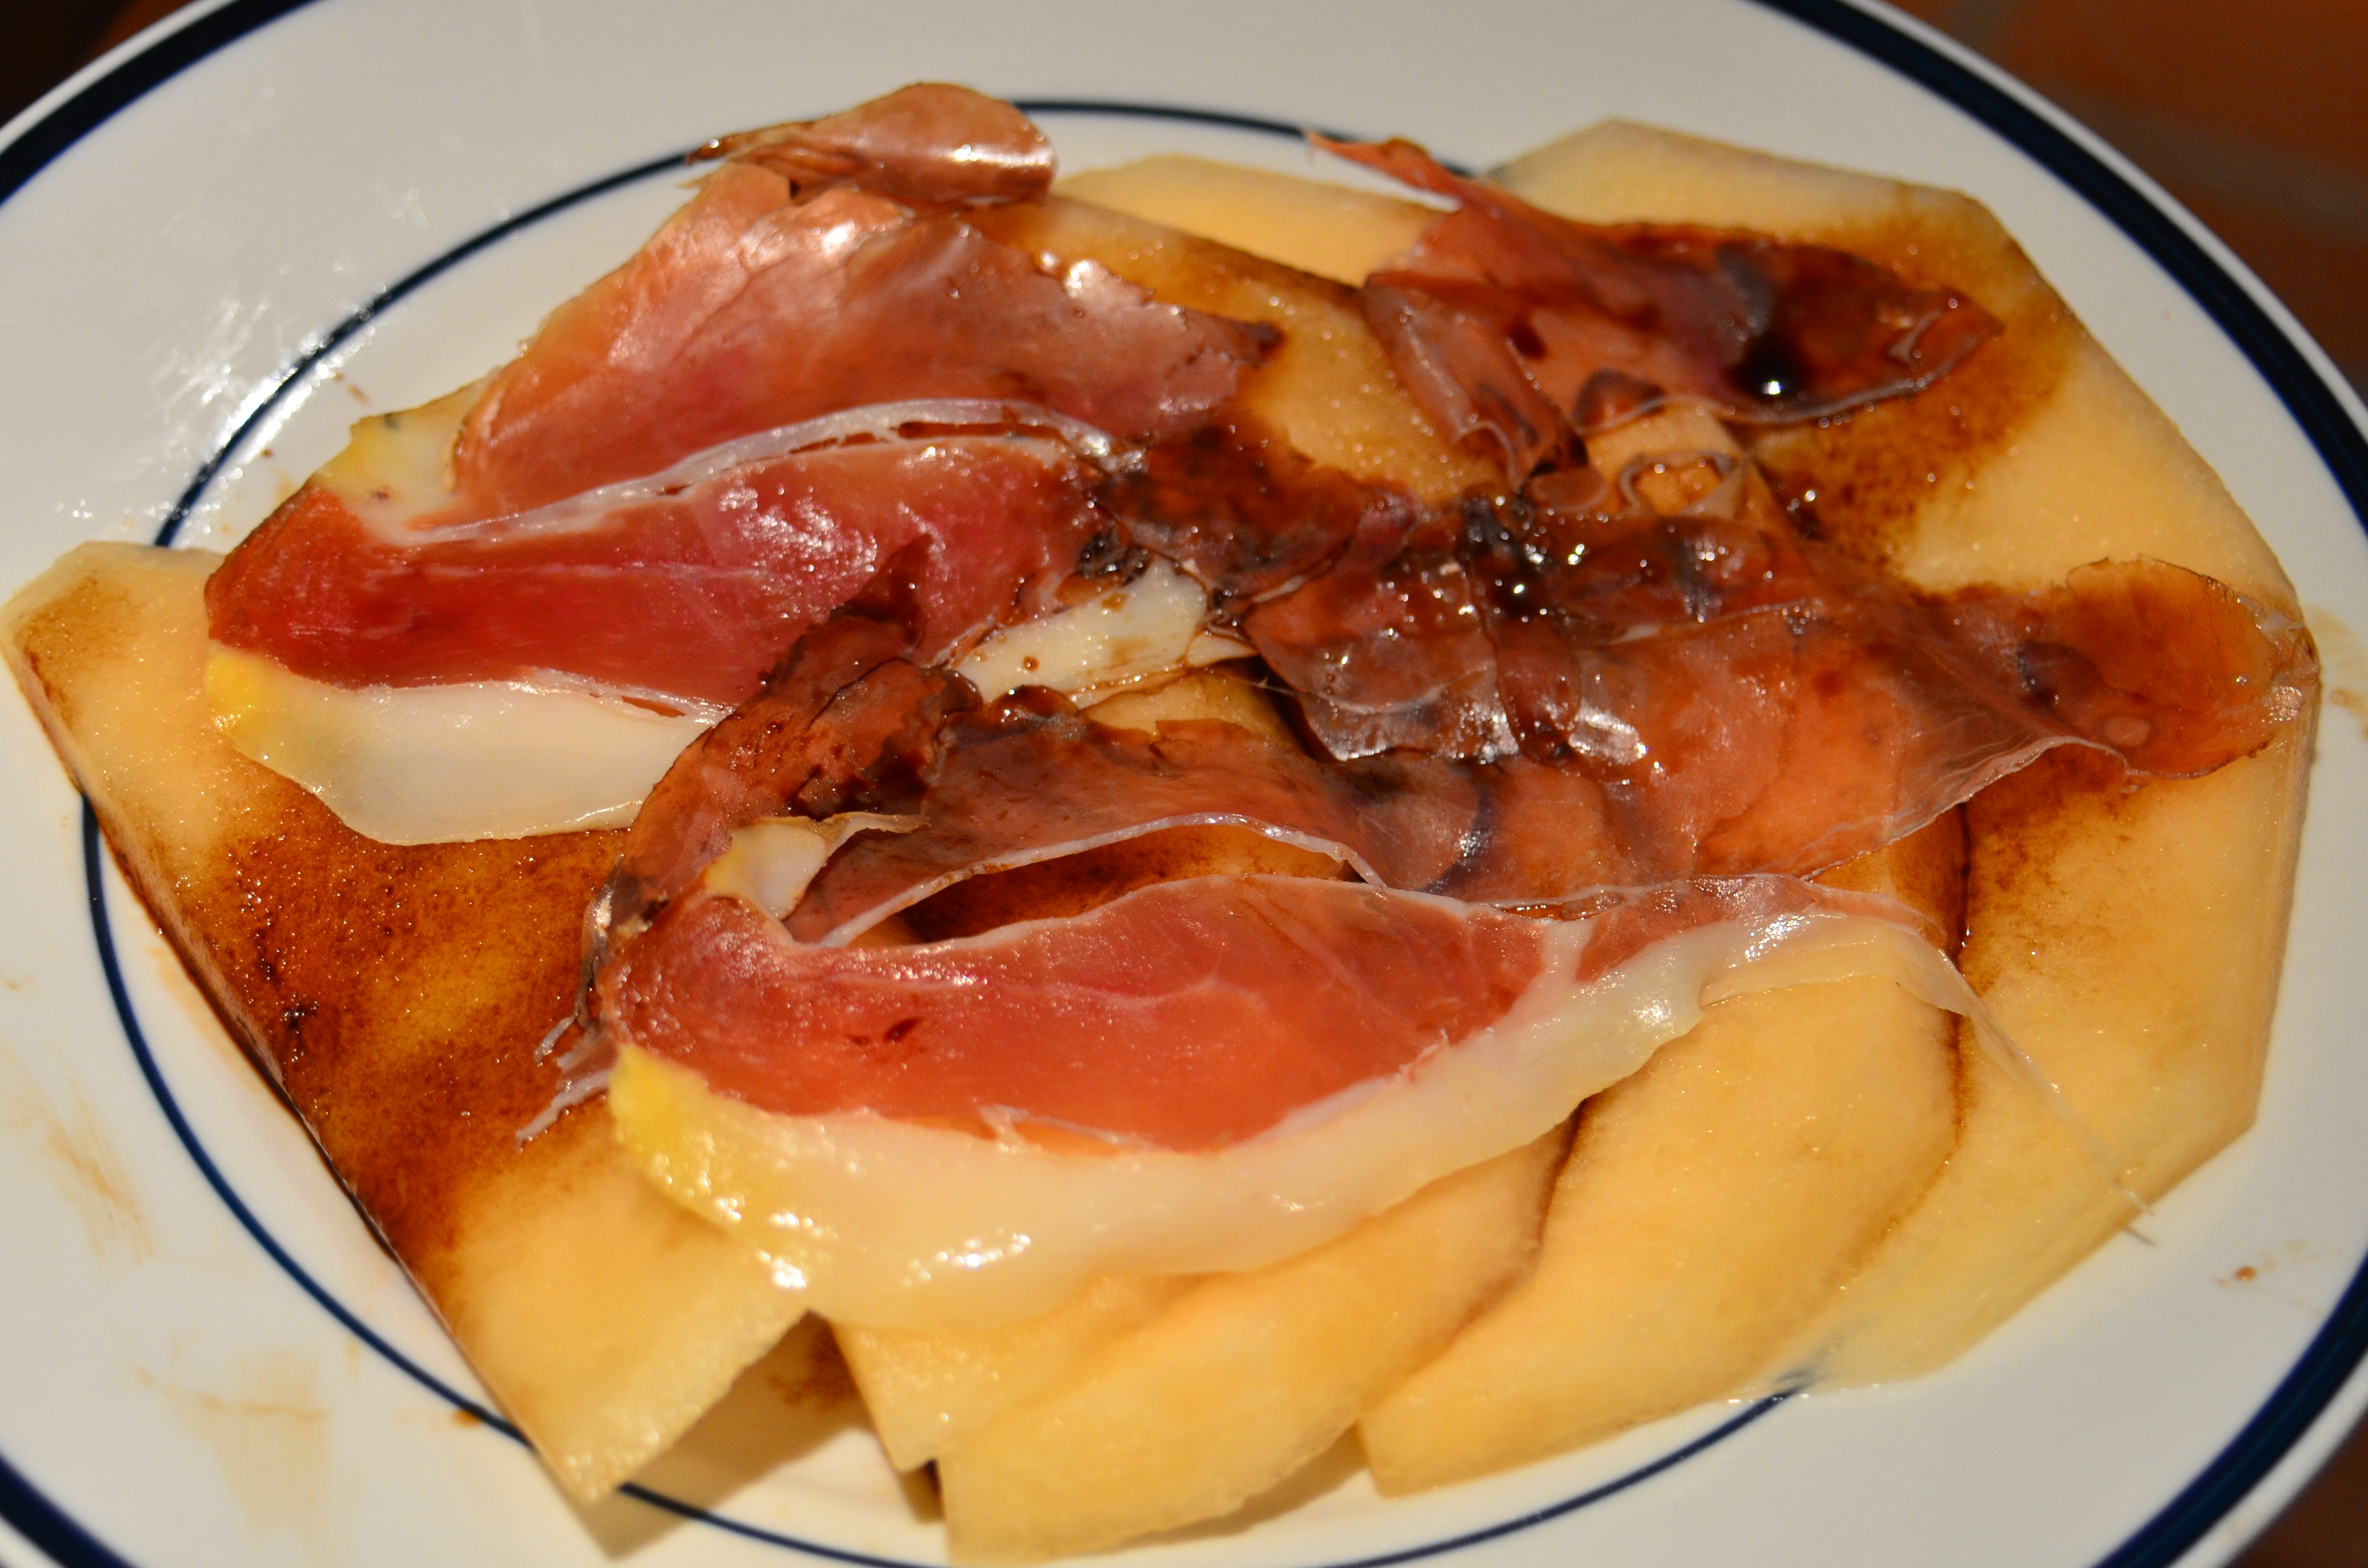
Slices of crenshaw melon with prosciutto and balsamic syrup
For our main course, Josh cooked up a gorgeous steak au poivre with lots of crushed peppercorns forming a nice crust on the meat. The sauce was made with cognac and cream – always a great combination. The foie gras fat-flavored roasted potatoes weren’t actually as flavorful as I had hoped, but you can’t go too wrong with crispy roasted potatoes. To cut through all the fatty and rich foods, we had an arugula salad on the side dressed with lemon juice and olive oil.
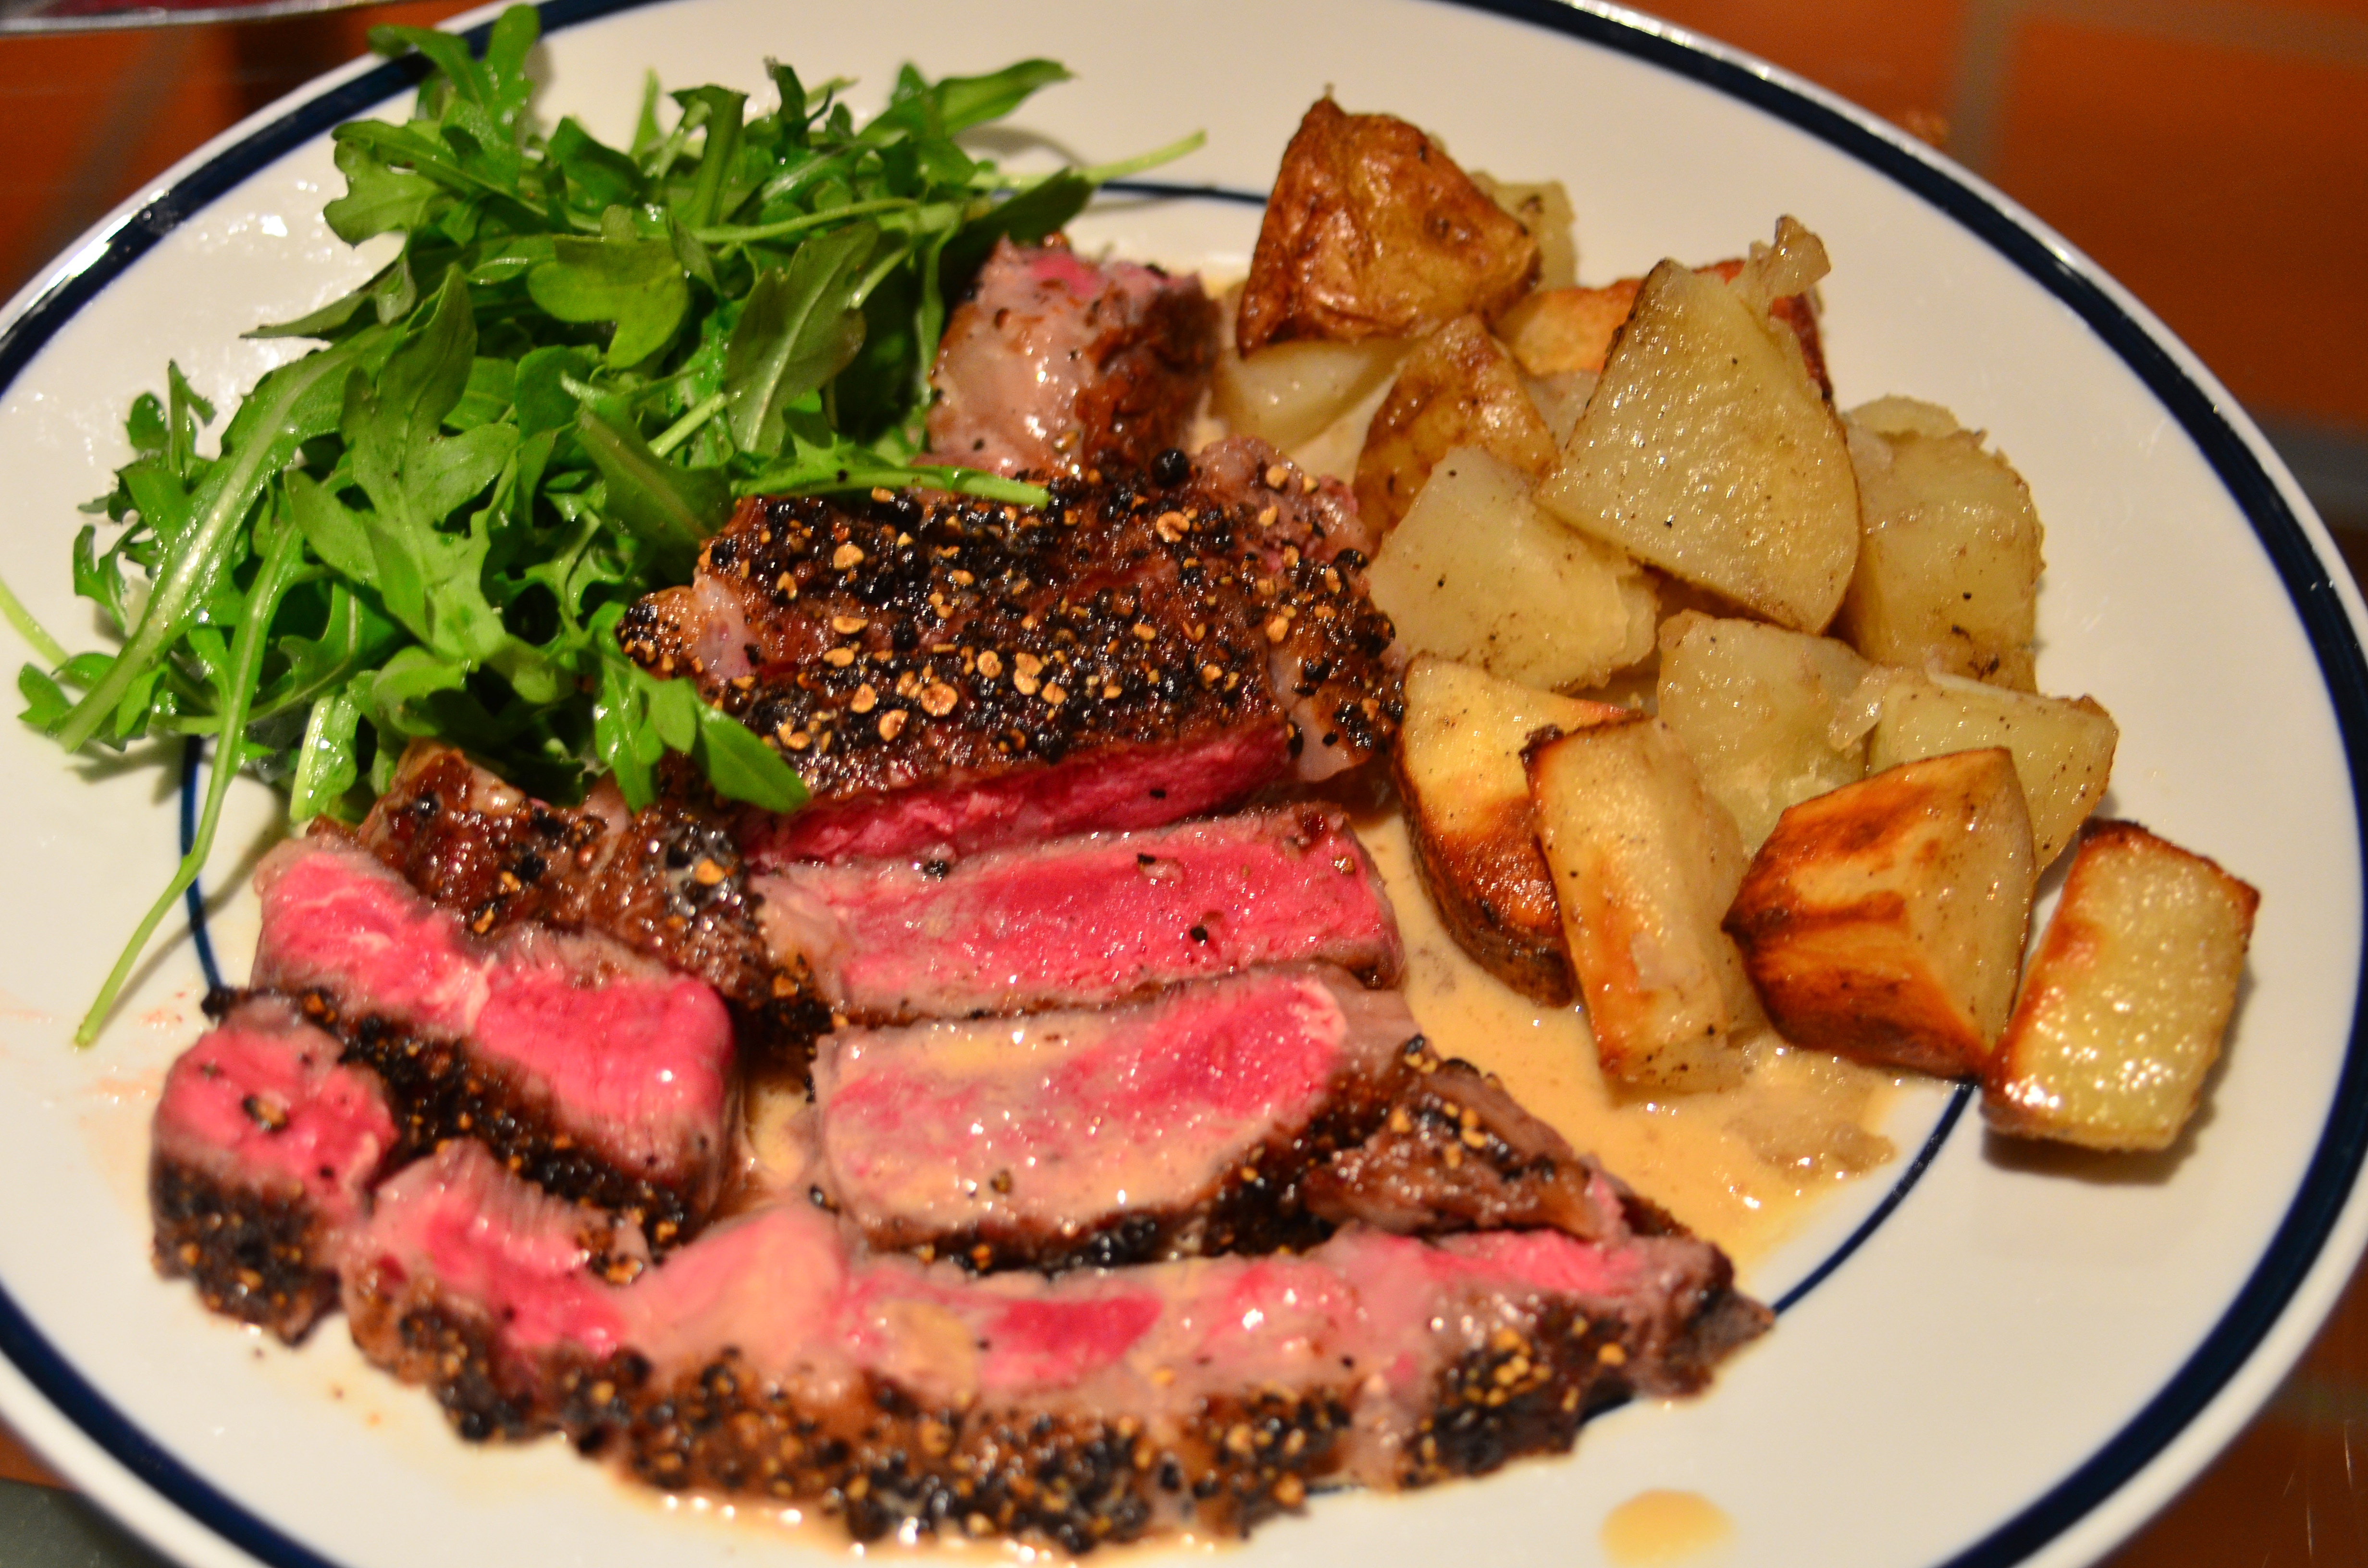
Steak au poivre with foie gras fat roasted potatoes and arugula salad
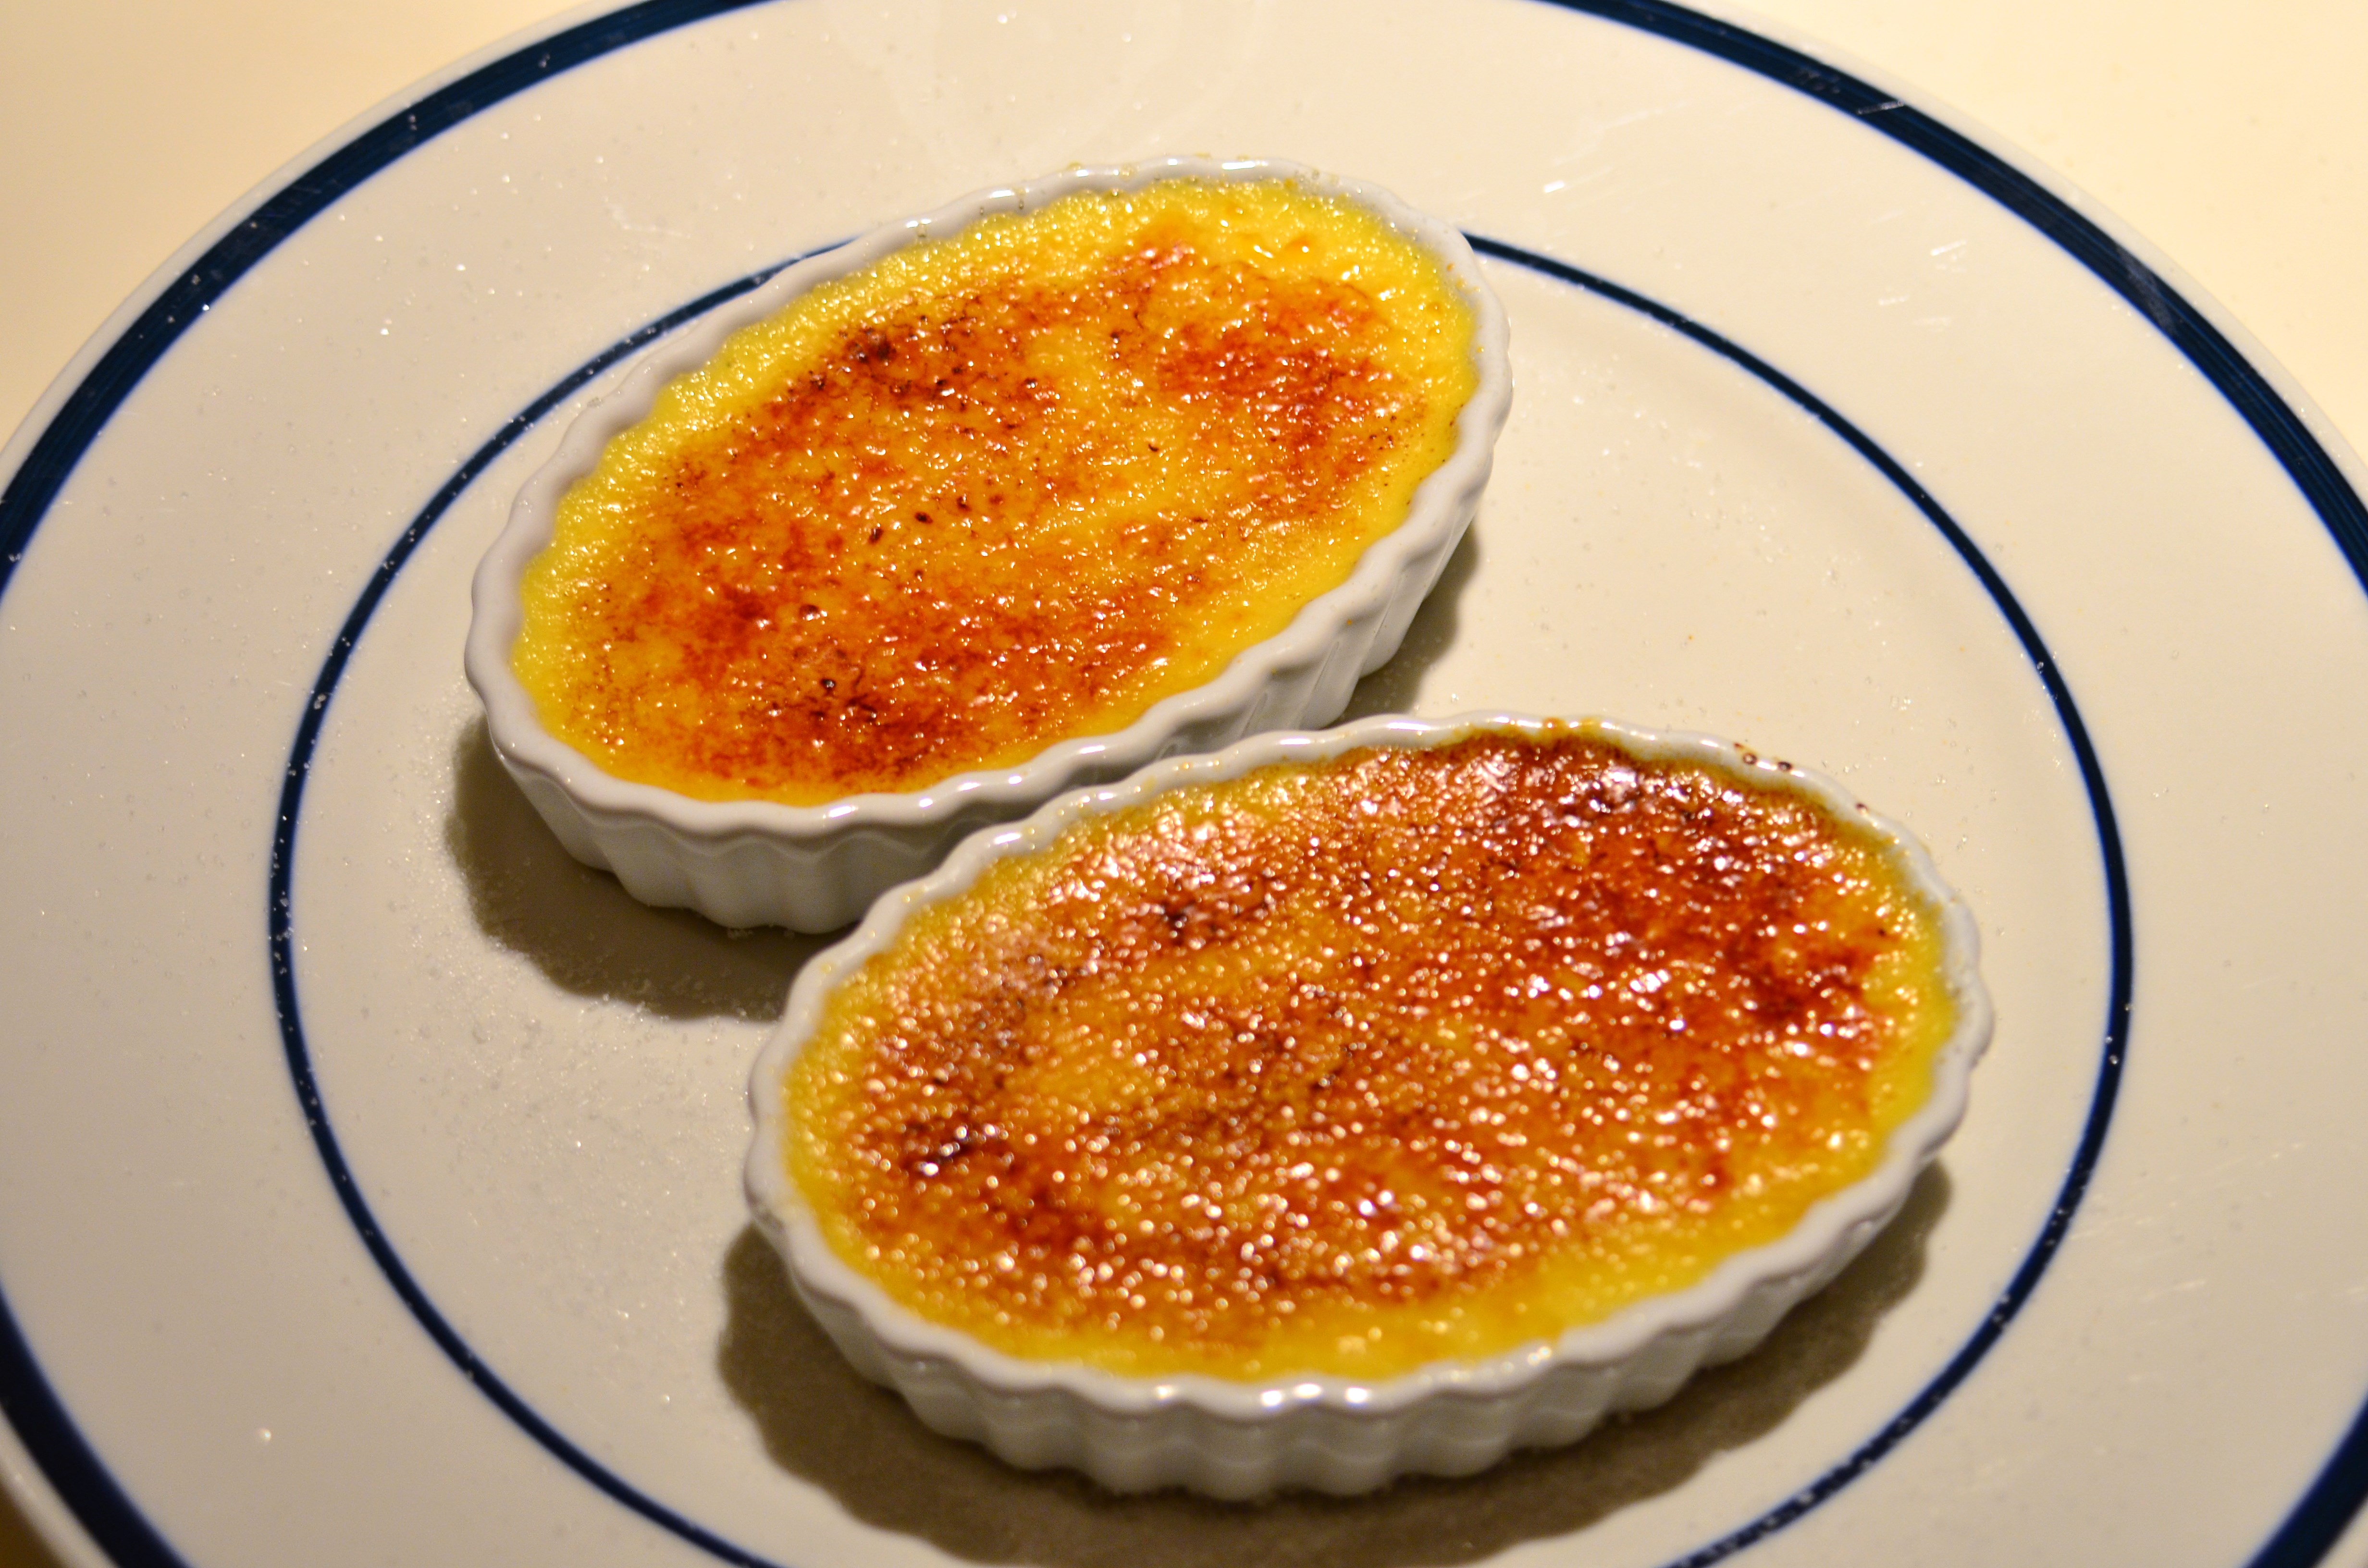
For dessert, Josh made a Grand Marnier souffle. His specialty is actually chocolate souffle, but he felt like experimenting with Grand Marnier for a change. Unfortunately we got a bit distracted with changing/feeding the baby while the souffles were in the oven, and the top ended up browning a little more than we would have liked. Nothing a little creme anglaise couldn’t cover up though. Once we got past the burnt top, the inside of the souffle was soft and fluffy. We could really taste the Grand Marnier, which gave it a little boozy kick at the end.
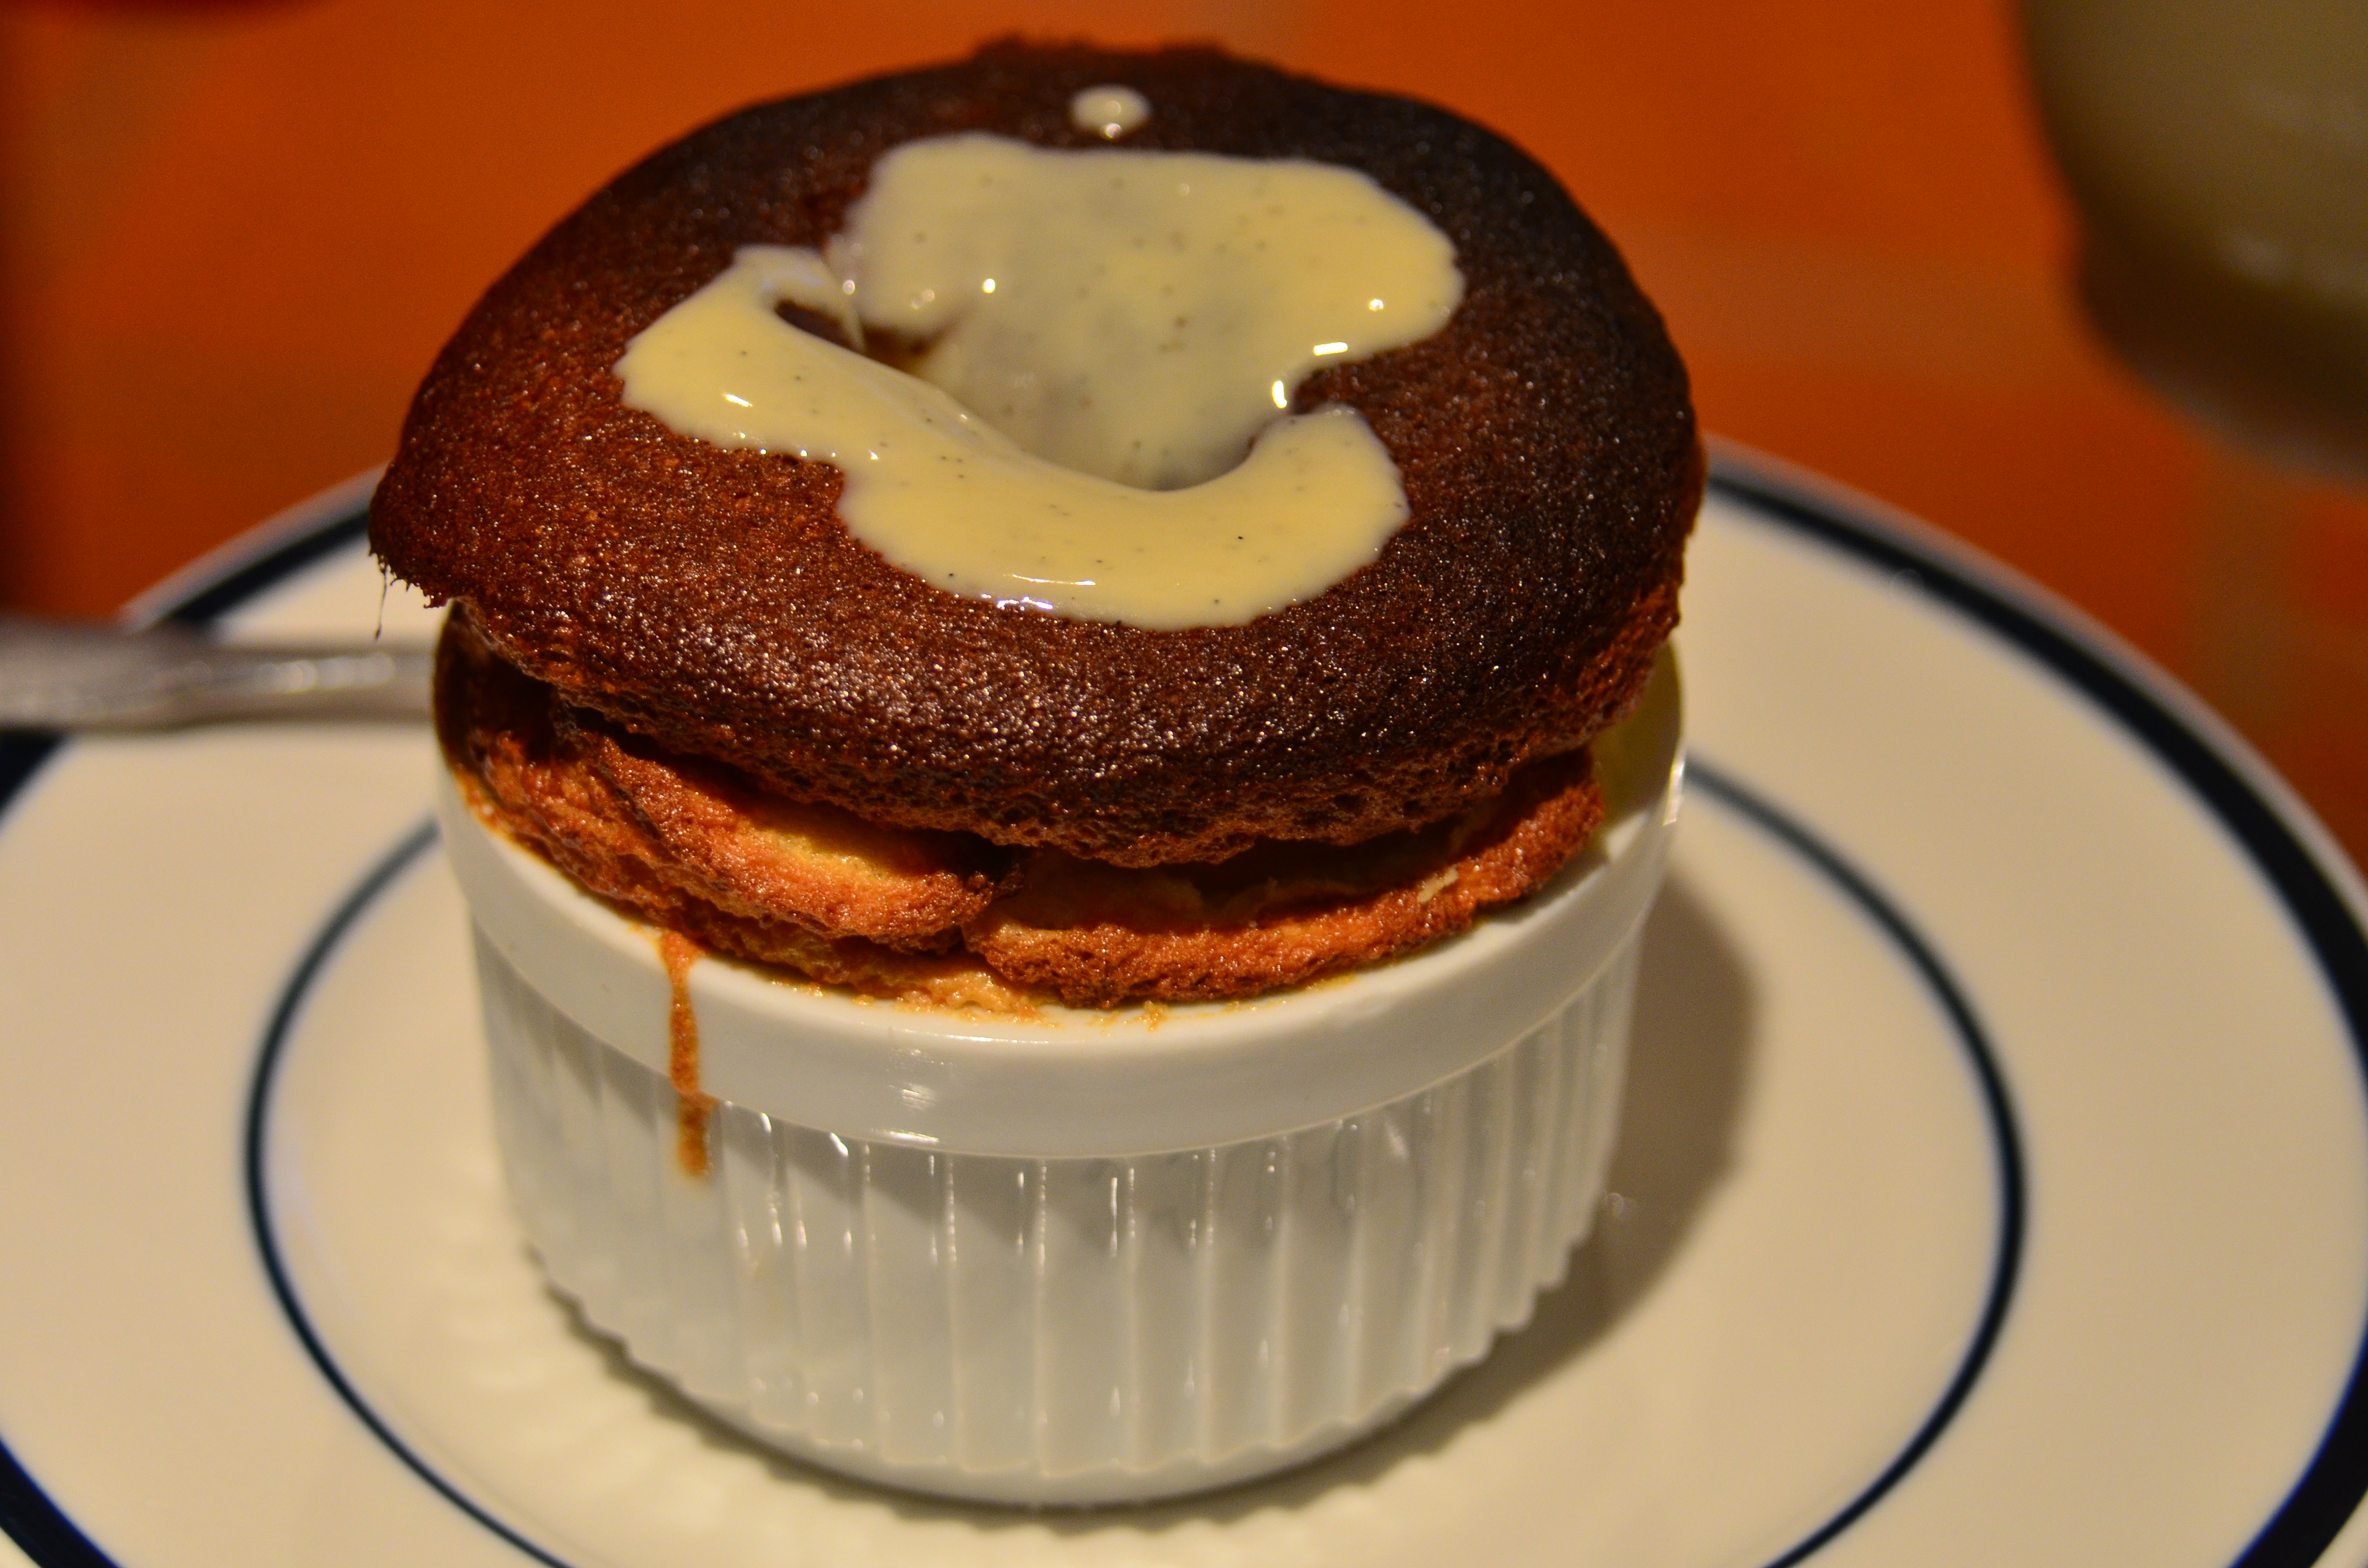
Grand Marnier souffle with creme anglaise
All in all, another great meal, mostly prepared by Josh. I was on baby duty while he handled the majority of the prep and cooking. In all fairness, I was responsible for a lot of the clean-up afterward (and he does make quite a mess when he cooks), but it was well worth it!