Archive for the ‘Recipes’ Category

Foodie Futbol

Thursday, July 15th, 2010 by virginia

Josh and I hosted a World Cup party at our apartment to watch the final between Spain and the Netherlands. We had decided long ago to cook foods from the competing nations, not knowing who would be in the championship match. We were rooting for Spain from the beginning so we hoped they would be one of the teams, and luckily they didn’t disappoint, but the other side of the bracket was a complete toss up. When the Netherlands prevailed, we were at a loss as to what to make to represent Dutch cuisine.

Planning the Spanish side of the menu was easy, as Josh and I both love Spanish food and he had done a semester in Barcelona during college. For the Dutch side of the menu, I ended up doing a few google searches, and although we couldn’t exactly pronounce the names of any dishes, we got some good recipes of stuff to make.

While Josh and I both like to entertain, we don’t exactly know how to do it without going overboard. We both love to cook and to share our cooking with other people, so when we have parties, we tend to make a million things. Most of the time we end up missing out on most of the party because we’re in the kitchen still cooking. We didn’t want to miss the soccer game though, since this was the whole point of our party, so we made sure to plan dishes that can be cooked ahead of time and easily reheated.

We had our planning done ahead of time, complete with detailed shopping lists and who would make what, but I think we were a bit overly ambitious and wound up pulling an all nighter – cooking, that is. We did all of our shopping on Saturday morning/afternoon in NJ, got back to the city around 7 pm, and promptly started prepping and cooking. 11 hours later, at 6 am, after the sun had set and risen, we finally went to bed. We got up three hours later and finished cooking, then set everything up for our party, which started at 1:30. It was a hectic and tiring process, but we did get everything done, we didn’t miss the game (hooray for Spain!), and everything turned out better than we hoped.

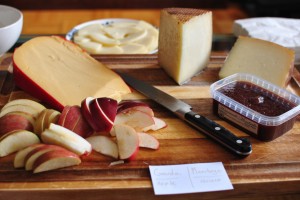
Since the theme of the party was the World Cup final, we kind of planned our menu to pair Spanish and Dutch dishes head to head. First up was our cheese board, which featured Spanish manchego cheese versus Dutch gouda. We paired the gouda with apple slices, and the manchego with membrillo, which is quince paste. The gouda was declared the winner, though the membrillo turned out to be a surprise hit. Silva and Felipe also brought a different kind of Spanish cheese that was milder than the manchego but still quite tasty.

Gouda/apples vs. Manchego/membrillo

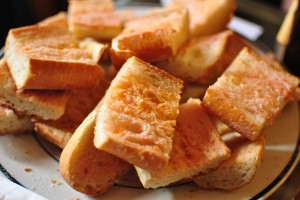
Next was the battle of the breads. On the Dutch side, we made Boerenkaas Puffs, which were cheese puffs made with gouda. The recipe we followed came from here. They were pretty similar to gougeres, very easy to make, and really delicious. On the Spanish side, we made pan con tomate, which is simply tomato bread. All you need to do is take a baguette, slice it in half length-wise, rub a clove of garlic on each side, and sprinkle each side with some salt and olive oil. Then you take some ripe tomatoes, cut them in half, and rub the juicy pulp all over the bread. Easy and really tasty. Both breads were a hit, so I think this may have been a toss up.

Boorenakas puffs (cheese puffs with gouda)

Pan con tomate (tomato bread)

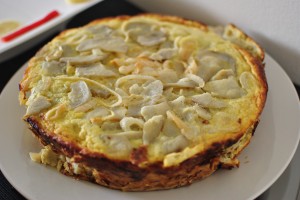
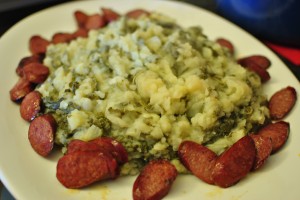
For the potato dishes, we had tortilla espanola on the Spanish side. The tortilla is basically a giant frittata with layers of potato, onion, and egg. To make the tortilla, we gently roasted potatoes and onions in the oven, layered it in deep dutch oven, and covered the layers with lots of scrambled eggs. We baked the tortilla in a 350 degree oven for about 20 minutes, until it was cooked through and had set. For the Dutch potato dish, we made Boerenkool Stamppot, which is a hodgepodge with mashed potatoes, onions, kale, and smoked sausage. This was the recipe we followed. The potato/kale mixture turned out to be a surprise hit, helped mostly by the smoked sausage we spread around it.

Tortilla espanola

Boerenkool Stamppot (kale hash with sausage)

For the main courses, this was where we showed our true colors. Since we were rooting for Spain, we made two Spanish entrees and only one Dutch entree. In actuality, we couldn’t decide on which Spanish dish to make so we made both. First was pollo ajillo, or chicken in garlic sauce. To make the chicken, we first brined it in salt water for a few hours. In the meantime, we gently cooked a whole head of minced garlic in olive oil to make a super flavorful garlic oil. Then we seared the chicken (we used bone-in thighs) in that garlic oil and placed them into a dutch oven with minced onions that had been carmelized in garlic oil. We deglazed the pan with white wine, poured that off into the dutch oven, and tossed in the garlic from the garlic oil into the mixture as well. To add even more garlic punch, we added slivers of garlic from an entire additional head of garlic. Then we added the zest of three lemons and enough chicken stock to cover the chicken. We cooked the chicken in the dutch oven, in the oven, at 350 degrees for several hours. Right before serving, we added the juice of the three lemons to brighten up the flavor. By the time we served the chicken, it was super tender and falling off the bone.

Pollo ajillo (chicken in garlic sauce)

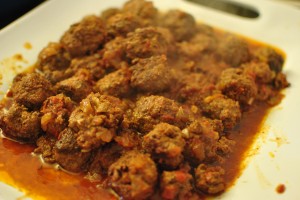
Our other spanish entree was albondigas, or meatballs. To make the meatballs, we mixed together ground beef, a puree of onions and garlic, and fresh pieces of diced onion. We used salt, pepper, cumin, and paprika to season the meat. We rolled and shaped the mixture into bite sized meatballs, then seared them off in a large pan. In a large pot, we sauteed some onions in garlic oil and added a big can of crushed tomatoes. When the meatballs were all seared, we added them to the pot of sauce and gently simmered them for a few hours. They were also super tender by the time we served them, and the flavor of the spices really shined through.

Albondigas (meatballs)

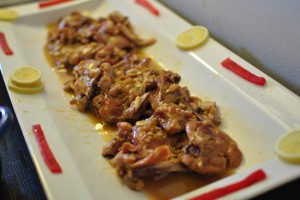
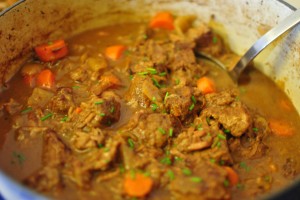
Our Dutch entree was Gestoofde runderlappen (try pronouncing THAT!), or braised steak. It was essentially a beef stew cooked entirely in beer. Simple, yet deeply flavorful. The recipe we followed came from here. The beef fell apart with a touch of a fork, and the carrots and onions added a nice heartiness to the dish.

Gestoofde runderlappen (braised steak)

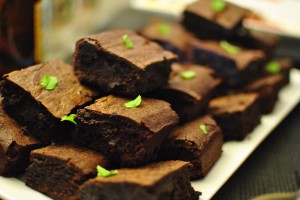
We didn’t forget about dessert! For the Dutch side, we tried to be a bit playful and decided to make herb brownies. The herb? Mint, of course. Josh and I had an argument about the brownies because I just wanted to use ones from a box, but he insisted on making them from scratch. He won out in the end by convincing me that it would be embarrassing to say on the blog that we made brownies from mix. It was kind of a victory for both of us, as he ended up being the one to make them at 5 am while I sulked on the couch nursing my aching knife arm. He used the cocoa brownie recipe from Alton Brown’s Good Eats: The Early Years, which is similar to the recipe posted here. The mint was our own addition (add a handful of fresh leaves to the butter as it’s melting, then strain). The brownies were intensely chocolatey, had a fudgey texture, and just a hint of mint in the background. They were super rich but I thought they were really good, so kudos to Josh.

"Herb" brownies (with mint)

Beauty shot of the rich, chocolately, minty deliciousness

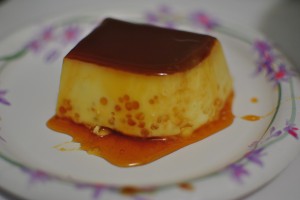
The Spanish dessert was all Josh as well (he’s the real baker in the family). Using another Alton Brown recipe, but substituting real vanilla bean instead of vanilla extract, the flan was a risky endeavor but a huge success. He also made his own caramel sauce, courtesy of Mr. Brown as well. The flan had the perfect texture, creamy and smooth, and the caramel sauce was thick and rich.

Flan with caramel sauce

Beauty shot

So the verdict? I think based on the entrees, Spain had the narrow victory. And not because we’re biased or anything. But the Dutch food was surprisingly really good, and I’m eager to try it for real next year when we head to Amsterdam in honor of Josh’s 30th birthday. Aside from the food, the game was really exciting as well. La Furia Roja eeked out the win in extra time, and we’re glad it didn’t end up going to penalty kicks. All in all it was a successful day, and totally worth the lack of sleep we endured. Plus we have oodles of leftovers to feast on for the rest of the week!
Red Leaf Lettuce With Radishes, Beets, and Goat Cheese

Sunday, July 4th, 2010 by virginia

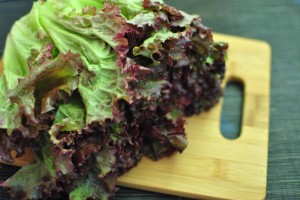
Red leaf lettuce

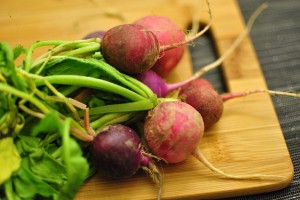
Radishes

As part of our second CSA share, we got a large head of gorgeous red leaf lettuce that we weren’t quite sure what we wanted to do with. Usually we only eat red leaf lettuce with Korean food, wrapped around pieces of grilled bulgogi or marinated pork. Since we didn’t have any on hand (H-Mart has really good pre-marinated meat that’s relatively cheap), we decided to make a simple salad with lettuce, beets, and goat cheese.

To make the salad dressing, I combined equal parts balsamic vinegar and olive oil, seasoned with salt and pepper, then added a dollop of mustard to make the dressing thicker. I blended it all together in my handy knock-off magic bullet, then tossed it with the washed and chopped red leaf lettuce.

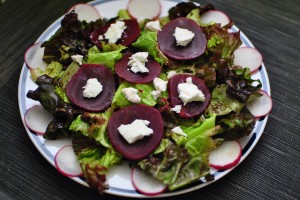
I piled the lettuce onto plates, then topped them with slices of canned beets. Some people might scoff at using canned beets, but I think they have good flavor and are super convenient. No mess, no fuss. On top of the beets, I added crumbled bits of soft goat cheese. To contrast the sweetness of the balsamic vinaigrette and the beets, I thinly sliced some CSA radishes and added it to the salad for some crunch and slight bitterness.

Red leaf lettuce tossed with balsamic vinaigrette, topped with beets, goat cheese, and radishes

It was a hearty salad, and although it was vegetarian, we still felt full afterward. It’s rare for us to not miss meat, but this was a great combination of flavors and textures. I could definitely eat this salad again and be satisfied!
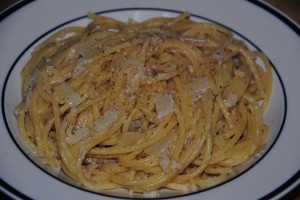
Spaghetti “Carbonara” with Turkey Bacon and Sauteed Greens

Thursday, July 1st, 2010 by virginia

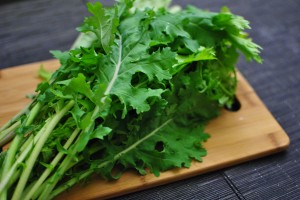
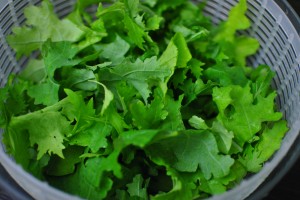
Greens

Going back to our first batch of CSA goodies, we got 3/4 lb of “greens”. I’m not sure exactly what kind of “greens” these are, but they had a pretty tough and thick stem running through the middle. The leaves were also on the thicker side and seemed pretty hearty, so we decided to saute them instead of eating them raw. I trimmed the stems and roughly chopped the leaves into 1 inch pieces.

Cut, washed, and ready to go

We wilted the leaves in some olive oil with minced garlic, and then set them aside. Instead of having plain sauteed greens, we decided to mix them into our recipe for spaghetti carbonara. To make the carbonara sauce, we cooked about 10 ounces of turkey bacon in a large pan until rendered and crispy. In the meantime, put a pot of spaghetti on to boil.

After it was rendered, we scooped out the bacon and deglazed the pan with a bit of white wine, about a cup. We let the wine reduce until the sauce had a thicker consistency. Meanwhile, we cracked two eggs into a large bowl and beat them until smooth. After draining the pasta, we dumped it into the pan with the bacon/wine sauce and stirred it around.

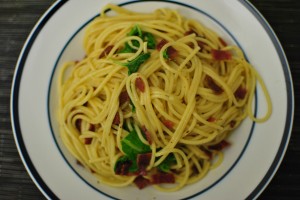
Using some of the hot pasta water, I tempered the eggs so that they wouldn’t scramble when we poured the hot pasta mixture into the bowl. I stirred everything quickly while Josh slowly poured the pasta into the bowl, making sure that the egg coated all of the noodles. Then we added the cooked bacon and sauteed greens and tossed everything together thoroughly. Make sure to taste and season with salt as needed. The greens added a nice vibrant color to the pasta.

Our version of spaghetti carbonara

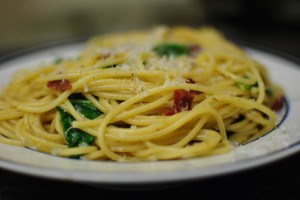
To finish it off, we grated some parmesan cheese on top and a few cranks of fresh black pepper. The carbonara sauce was lighter than other versions, but still had that nice glossy, velvety richness from the egg. It’s definitely an easy dish to make, and adding greens to the mix just somehow makes you feel better about eating a sauce made from bacon. At least it was turkey bacon, right? That’s what we like to tell ourselves…

Mmm bacon (and greens!)

Minty Mojitos

Monday, June 28th, 2010 by virginia

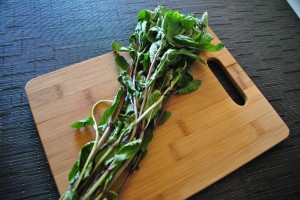
Minty mint

So what do you do with a third of a pound of mint? That’s the dilemma we faced when we got our first CSA share. Josh and I like mint but don’t really cook with it too often, plus we still have our mint plant from last year that is surprisingly still alive and producing leaves. We decided to go with the more obvious route and made a few batches of minty mojitos.

To make a mojito, muddle together a handful of mint leaves, a teaspoon of sugar, and the juice of half a lime. Really squish it all together for about a minute to extract every last bit of flavor. Add rum into the container where you’ve been muddling the other ingredients and swirl it around a bit. We like two shots per drink. Pour it all into a cocktail mixer with ice. Shake well, pour into glasses filled with ice, top off with club soda, garnish, and serve.

Lime mojitos

We also made mojitos with lemons (are they still considered to be mojitos?) when we accidentally ran out of limes. Mint lemonade is a classic summer drink, and adding rum into the mix only made it better. Vodka would probably do the trick as well.

Lemon mojitos

The mint really works well with the citrus, and you can boost up the flavor even more with citrus-flavored rum. The amount of rum/sugar/club soda can vary between personal tastes, but adding a lot of fresh mint leaves really brightens up the drink. It’s perfect for these hot summer days!

Roasted Bok Choy

Thursday, June 24th, 2010 by virginia

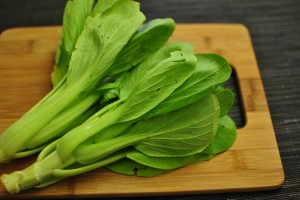
Bok choy

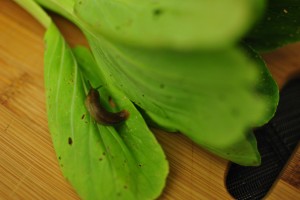
Based on a recommendation by commenter Sean, we took our CSA bok choy and roasted it in the oven. Our usual method of preparing bok choy is to chop it up into smaller pieces and sautee it with olive oil and garlic, but cooking it in the oven seemed much simpler and quicker. Our first step was to separate the leaves from the core, but as I attempted to do so, I found a little surprise…

Well hello there Mr. Slug!

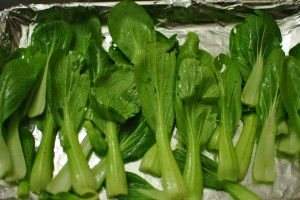
I was a little freaked out but hey, this stuff really is coming straight from a farm so it should be expected. I removed Mr. Slug and carefully washed the leaves. After drying them thoroughly, I tossed them with a bit of olive oil, salt, and pepper, then laid them out on a large baking sheet.

Bok choy on a baking sheet ready to go into the oven

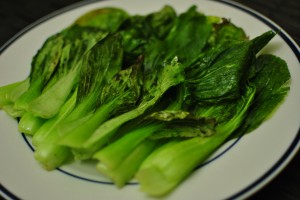
I placed the baking sheet in the oven preheated to 450 degrees and kept it in for about 10 minutes, watching it carefully. When the edges of the leaves started to visibly crisp up, I pulled them out and seasoned the bok choy with more salt and pepper, plus a few squeezes of fresh lemon juice.

Oven roasted bok choy

Wow the bok choy was awesome! It was cooked through but still crisp and juicy. The lemon juice added a brightness to the already fresh flavor, and it really couldn’t have been more simple to prepare. We covered the baking sheet in foil first, so clean up was a breeze – just pull off the foil and toss in the trash! It was a great side dish to our meal, and I have a feeling we’ll be cooking bok choy like this from now on.

Light Caesar Salad

Thursday, June 17th, 2010 by virginia

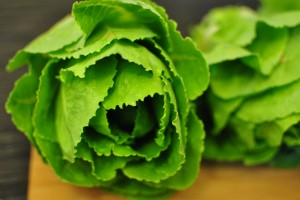
Gorgeous romaine lettuce

As part of our first CSA share, we received two medium-sized heads of romaine lettuce. They were really gorgeous – vibrant green, fresh, and crisp. We wanted to make caesar salad with it, but our usual homemade dressing is pretty heavy and thick. We didn’t want to overwhelm the lettuce and lose the fresh flavor so we decided to lighten it up a bit by omitting the egg and garlic and putting in a smaller amount of anchovy paste.

The dressing really couldn’t be simpler, and I made it in my knock-off magic bullet blender. Just throw the following ingredients in, eyeballing the amounts:

-Juice of one lemon
-About a teaspoon of anchovy paste
-A dash of worcestershire sauce
-Grated parmesan cheese
-Salt
-Pepper
-Olive oil

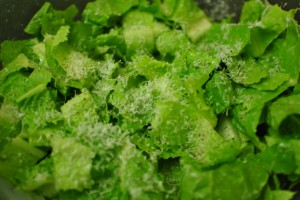
The amount of olive oil depends on how thick you want it to be. I started with about a quarter of a cup and then increased it to make the dressing a bit thicker, so that it would cling to the leaves. Blend, and then toss with the leaves, which we cleaned and chopped into 1 inch pieces. Grate some extra parmesan over the top, and a few grinds of pepper.

Lightly dressed leaves

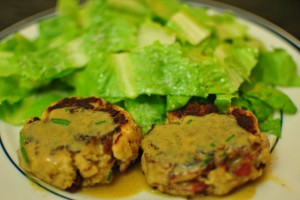
The salad was really fantastic, with the lemon brightening everything up. The lettuce itself was the best romaine we’ve ever eaten, crisp and flavorful, not watery and bland like the romaine you get from the supermarket. We served the salad alongside some tilapia cakes that Josh made extra special by adding in some bits of crunchy turkey bacon. It was a light meal but packed with flavor, and so very easy to prepare.

Tilapia cakes with caesar salad

Garlic Scape Pesto

Friday, June 11th, 2010 by virginia

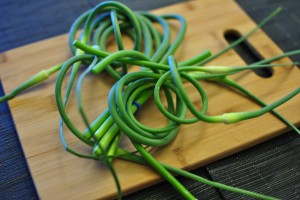
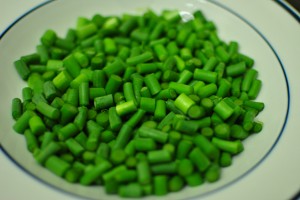
Garlic scapes

As I mentioned in my previous post, our bounty from week #1 of our CSA share included four garlic scapes. What are garlic scapes? Basically, they’re what grows out of a garlic bulb when you leave the bulbs unused for too long. Who knew those green plants sprouting out were edible? Not us!

Our CSA posts recipes for various vegetables, and I saw one for garlic scape pesto. I love pesto sauce so that seemed like the best use of the scapes. We didn’t have all the right ingredients on hand though but it wasn’t too hard to find a recipe that worked for us. I did a quick internet search and found this recipe from Dorie Greenspan. Dorie’s recipe required 10 scapes though, so I sent Josh to the 57th St. Greenmarket to pick up an extra bunch of scapes. I ended up with 9 in total and I figured, close enough!

This is what Dorie’s recipe calls for:

-10 garlic scapes, finely chopped
-1/3 to 1/2 cup finely grated Parmesan (to taste and texture)
-1/3 cup slivered almonds (you could toast them lightly, if you’d like)
-About 1/2 cup olive oil-
Sea salt

To prepare the scapes, I washed them and cut off the top flower bud part, then chopped the rest of the stalks into little pieces. It doesn’t have to be even since it’s all going into the food processor anyway.

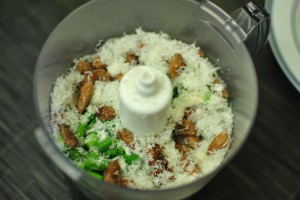
We only had whole almonds on hand, which I toasted, and I tossed everything into the food processor for a whirl.

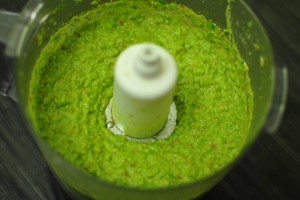
When I tasted the pesto though, it was sharper than I expected it to be. It definitely packed a garlicky punch, but was also slightly spicy. The Greenmarket scapes were significantly larger than the CSA scapes, so perhaps the older and bigger the scape is, the stronger/sharper it gets in flavor? I ended up tossing in twice the amount of parmesan cheese and twice the amount of olive oil to try to mellow out the flavor more.

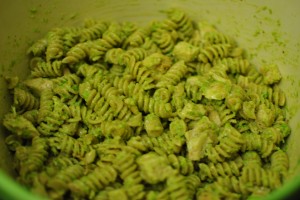
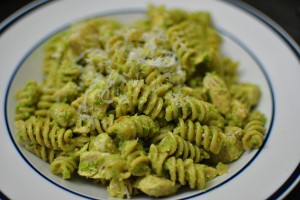
The extra cheese and oil did help, and the pesto came out as a thick, creamy paste. I tossed it with some whole wheat rotini pasta and some diced cooked chicken. The pesto was a bit too thick, so I added some pasta water to help loosen it up a bit. It’s a neat little trick I learned from watching Lidia’s Italy.  Make sure to season the dish with salt and pepper to taste.

Lastly, I topped the pasta with even more grated parmesan. There’s never such a thing as too much parmesan!

Overall we both liked the garlic scape pesto but I found the flavor to be a bit too nutty. I would reduce the amount of almonds next time, but that might just be a personal taste. Josh thought the garlic flavor was slightly too sharp, so another alternative would be to sautee the scapes for a bit to mellow them out. But making pesto is super easy, and we had a delicious and healthful meal on the table in less than 30 minutes. The scape pesto worked brilliantly with a nice cold bottle of pinot grigio, and Josh and I were both pretty happy campers.

Venetian Spaghetti with Sardines

Sunday, April 11th, 2010 by virginia

I saw this recipe on Serious Eats and knew that I would have to try it, since it was described as tasting like clam chowder on pasta. I love clam chowder, and I love pasta. Putting the two together just seemed simply genius to me. I ended up trying out the recipe for Lent and it worked out pretty well, but it wasn’t quite like clam chowder. The sardines definitely have a fishier flavor, which I didn’t mind, but when I reheated some in the microwave at work I was very aware of how fishy it smelled. Nevertheless, this is a pretty quick and easy pasta to make, and most of the ingredients you probably already have on hand. It’s a rich and comforting dish, and I would definitely make it again.

Ingredients:

-2 tablespoons unsalted butter
-2 tablespoons extra-virgin olive oil
-2 medium onions, finely chopped
-One 4-ounce can olive-oil-packed sardines
-1 cup whole milk
-Salt and freshly ground pepper
-1 pound spaghetti

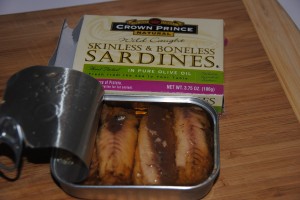
The directions couldn’t be easier. First, put a pot of water on to boil for the pasta. De-bone the sardines and chop them up into small pieces. I used sardines that were already skinned and boned, which saved me an extra step.

Skinless and boneless sardines

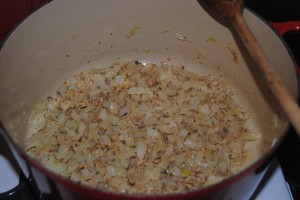
Then cook the onions in the butter and olive oil until they start to get brown. Chop up the sardines and throw it into the pot with the onions, then add a bit of water and mix it all together.

Sauteed onions and chopped sardines

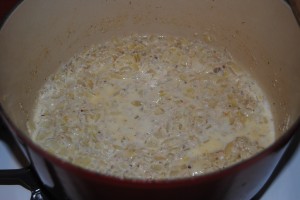
Add in the cup of milk and bring it to a boil, stirring often so that the sardines melt into the sauce. Keep it simmering for about 10 minutes, until it thickens.

Creamy onion and sardine sauce (seriously, it's good)

Meanwhile, cook the pasta, and when it’s ready, toss it into the sauce and mix well until all the strands are coated. If it’s too thick, add some more milk or pasta water to loosen it up. Season with salt and pepper. I finished it with a bit of olive oil and a good sprinkling of pepper on top.

Venetian spaghetti with sardines

For the full recipe, please click here!

The Best French Onion Soup Recipe Ever

Monday, March 15th, 2010 by virginia

If you love french onion soup like I do, you have to try this recipe. It’s seriously the best french onion soup that I’ve ever eaten, hands down. And aside from some stirring that you have to do in the middle, this recipe is super easy. I’m actually going to list ingredients and step by step directions because I love it so much, and I want you guys to get it right as well. I learned it from watching an episode of “America’s Test Kitchen”, which is one of my favorite cooking shows on PBS. All it takes is a little time and a little love, and you’ll have a huge pot of amazingly delicious french onion soup.

Best French Onion Soup Recipe
Adapted from America’s Test Kitchen

Ingredients:

-4 lbs yellow onions
-3 tablespoons butter
-1/2 cup sherry
-4 cups chicken broth
-2 cups beef broth
-1 bay leaf
-sprig of thyme
-water
-salt
-pepper
-toasted baguette slices
-grated or thinly sliced cheese (any combination of gruyere, swiss, jarlsbeg, and parmesan)

Directions:

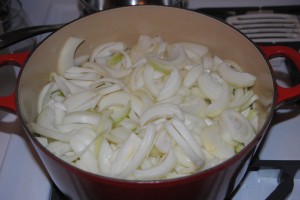
1. Preheat your oven to 400 degrees. Spray the inside of a dutch oven with nonstick cooking spray, or pour some oil into the bottom and spread it all around with a paper towel. Cut the butter into smaller pieces and scatter it around the bottom of the dutch oven. Cut the onions in half through the root end, and slice into 1/4 inch thick slices from pole to pole. Put the slices of onion into the dutch oven and sprinkle 1 teaspoon of salt over the top. Cover the dutch oven and place it into the oven for 1 hour.

Four pounds of sliced yellow onions in a dutch oven with three tablespoons of butter

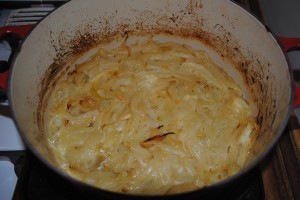
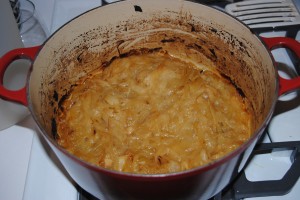
2. Remove the dutch oven after an hour and take off the cover (use oven mitts!), stirring the onions and scraping down the sides. The onions should just be starting to brown. Replace the cover on the dutch oven but leave it slightly ajar cook for another hour. Stir and scrape down the sides again, then put it back in the oven with the cover still ajar for another 45 minutes.

Onions after one hour in the oven

Onions after two hours and 45 minutes in the oven

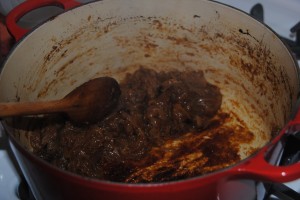
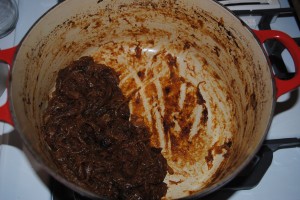
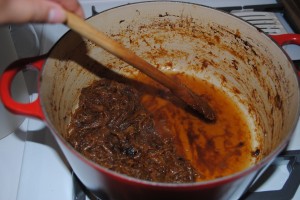
3. Remove the pot and place it on the stove over a medium high heat. Stir frequently and scrape down the sides. After 15 minutes, a dark crust should form at the bottom of the dutch oven. Don’t be alarmed! This is fond, and it’s full of flavor. It can get to be a very dark brown, just watch that it doesn’t get too black or burned. Turn down the heat if necessary. After the fond is formed, pour in 1/4 cup of water and scrape the fond up from the bottom, stirring it into the onions. After the water has evaporated, cook the onions for another 6-8 minutes until another fond crust forms at the bottom of the dutch oven. Add another 1/4 cup of water and scrape it up from the bottom, mixing it into the onions. Repeat this process 4 times in total. The onions will be very brown and soft at this point – that’s a good sign!

Developing dark fond at the bottom of the pot

Adding water and scraping up the fond from the bottom

4. After the fourth scraping, let the fond develop one more time, then deglaze with 1/2 cup of sherry. Scrape up all the brown bits and mix it with the onions. At this point the onions should be a very dark, deep brown color.

Adding sherry and deglazing the bottom of the pot one more time

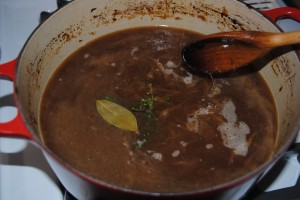
5. Pour in 2 cups of water and both the chicken and beef broths. Add in the bay leaf and a sprig of thyme. Stir to combine, then turn the heat up to high. When the soup starts to boil, cover the dutch oven and turn the heat to low. Simmer for 30 minutes. Taste and adjust for seasoning, adding salt and pepper as needed.

Adding in chicken broth, beef broth, and water, and simmering with a bay leaf and thyme

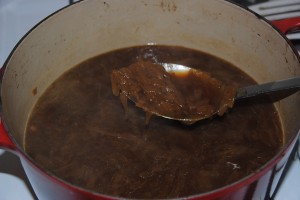
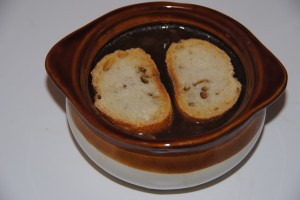
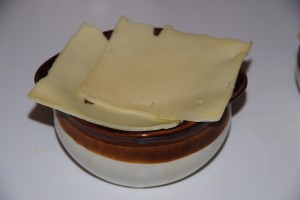
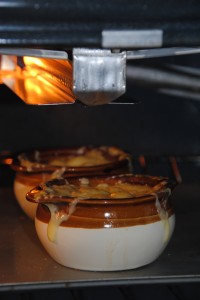
6. To prepare the soup for serving, toast slices of baguette. Ladle some hot soup into an oven safe bowl and cover the top of the soup with the toasted baguette. Top the baguette slices with cheese. Gruyere is the classic preference but I like to use a combination of jarlsberg and parmesan. Place the bowls of soup on a cookie sheet and side it under the broiler. Watch it very carefully as the cheese bubbles and browns very quickly.

After the soup is done simmering, ladle some into oven safe bowls

Top the soup with toasted baguette slices

Slices of jarlsberg go on top

Bubbling and browning cheese under the broiler

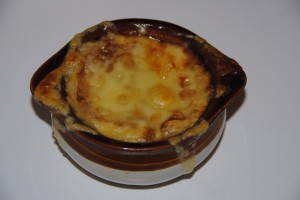
7. Remove the bowls from the oven very carefully and place on plates to serve. The bowls are super hot so be careful! Let it cool down a bit but be sure to eat it while it’s hot and the cheese is melted and stringy.

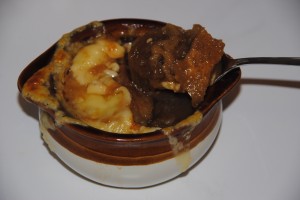
Homemade french onion soup hot and ready to eat

Every time I eat this soup, I still marvel about just how tasty it is. The broth is rich and deep, and the onion flavor really shines through. It’s better than any french onion soup that I’ve had at restaurants, and it’s really easy to make, I promise! Please try this recipe, and let me know how it turns out!

Bon appetit!

Pasta with Pink Vodka Sauce and Chicken

Thursday, February 4th, 2010 by virginia

As I’ve mentioned before, when Josh is away for work, I tend to get lazy and end up eating leftovers or slices of pizza from our failed pizza quest that we have stashed in our freezer. I don’t like to eat by myself so when I’m alone, I don’t really think too much about what I’m eating. One night, however, after a particularly long stretch of business trips for him, I couldn’t stand eating any more freezer burned pizza so I rooted around our fridge and pantry to see what ingredients we had on hand. I finally settled on making pasta with pink vodka sauce and chicken. It’s quick and easy to make, tasty, and one of my favorite comfort foods.

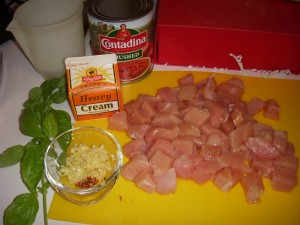
As with most of my cooking, I don’t really follow any particular recipe to the letter. To start, I prepped my ingredients by mincing a few cloves of garlic, washing off a stalk of fresh basil leaves from my surprisingly still thriving basil plant, and cubing up two boneless chicken breasts into bite size pieces. That’s basically all the grunt work that you need to do for this dish. Also, make sure you put a pot of water on to boil right away, so that you can put the pasta in just before the sauce is finished and your boiling water will be waiting for you, instead of the other way around.

All the sauce ingredients prepped and ready to go

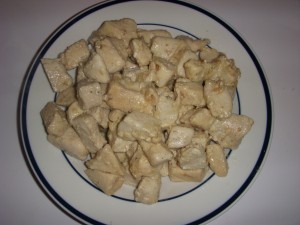
To cook the chicken, I heated up olive oil in a large and deep sautee pan with about a third of the minced garlic and tossed in the pieces of chicken. Make sure to season the chicken liberally with salt and pepper. When the pieces are almost cooked through, I pulled them off and moved them into a bowl. It’s ok if they’re still slightly underdone, as they’ll be added into the sauce later and cooked through some more.

Cook the chicken first, then set aside in a bowl

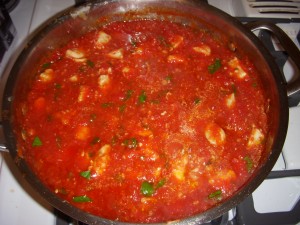
Using the same pan, heat up some more olive oil on medium heat and throw in the rest of the garlic. Add a pinch or two of red pepper flakes, depending on whether you want the dish to be spicy (or you can leave that out altogether). After the garlic is just starting to brown, add a 28 oz can of crushed tomatoes and cook until simmering. Season the tomato sauce to taste with salt/pepper/thyme. When the sauce starts to bubble a little, pull the pan off the flame and carefully add in one cup of vodka. Place the pan back on the stove and mix the vodka around in the sauce, letting it bubble away. I threw the chicken back into the sauce at this point, and started cooking the pasta in the boiling water as well.

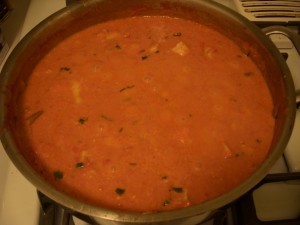
Simmering the tomato sauce with vodka

Cook the sauce long enough so that the flavor of the vodka stays but the bite of the alcohol is dissipated. At this point, cut the basil into small strips and add it into the sauce, then pour in one cup of heavy cream. Stir the sauce until the cream is combined, and the sauce takes on a nice pink hue. I let that reduce a bit so the sauce is rich and creamy, but not super thick. Take the time to taste the sauce and season it one more time.

Add the heavy cream and reduce until the sauce is rich and slightly thicker

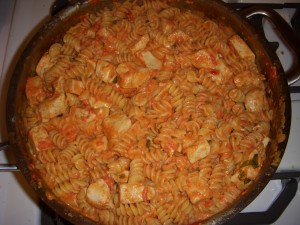
Drain the pasta and toss it directly into the sauce (this is why I use a large and deep sautee pan for the sauce). I used rotini this time, but my preference is farfalle. Basically any shape of pasta that has a few grooves is fine (so not spaghetti or linguini), as they help the sauce cling better. I tossed everything together to incorporate the sauce and disperse the chicken pieces evenly throughout.

Add in the cooked pasta and toss everything together

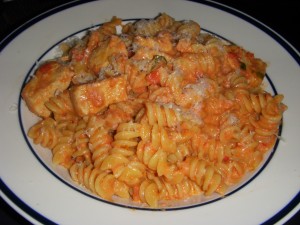
Finally, I scooped out a portion into a bowl and topped it with a sprinkling of grated parmesan cheese. Yum!

Pasta with pink vodka sauce and chicken, topped with grated parmesan cheese

Like I’ve said, I don’t really measure things out when I cook so none of the ingredients have exact measurements. If you like garlic, add more garlic. If you don’t like the flavor of vodka, use less. If you like the sauce to be thicker and richer, use more heavy cream. It’s a pretty basic “recipe” and can be altered at any point to suit your own taste. As for me, I had a big pot of rich and comforting pasta to last me the week, and it was much better than eating freezer burned pizza.